

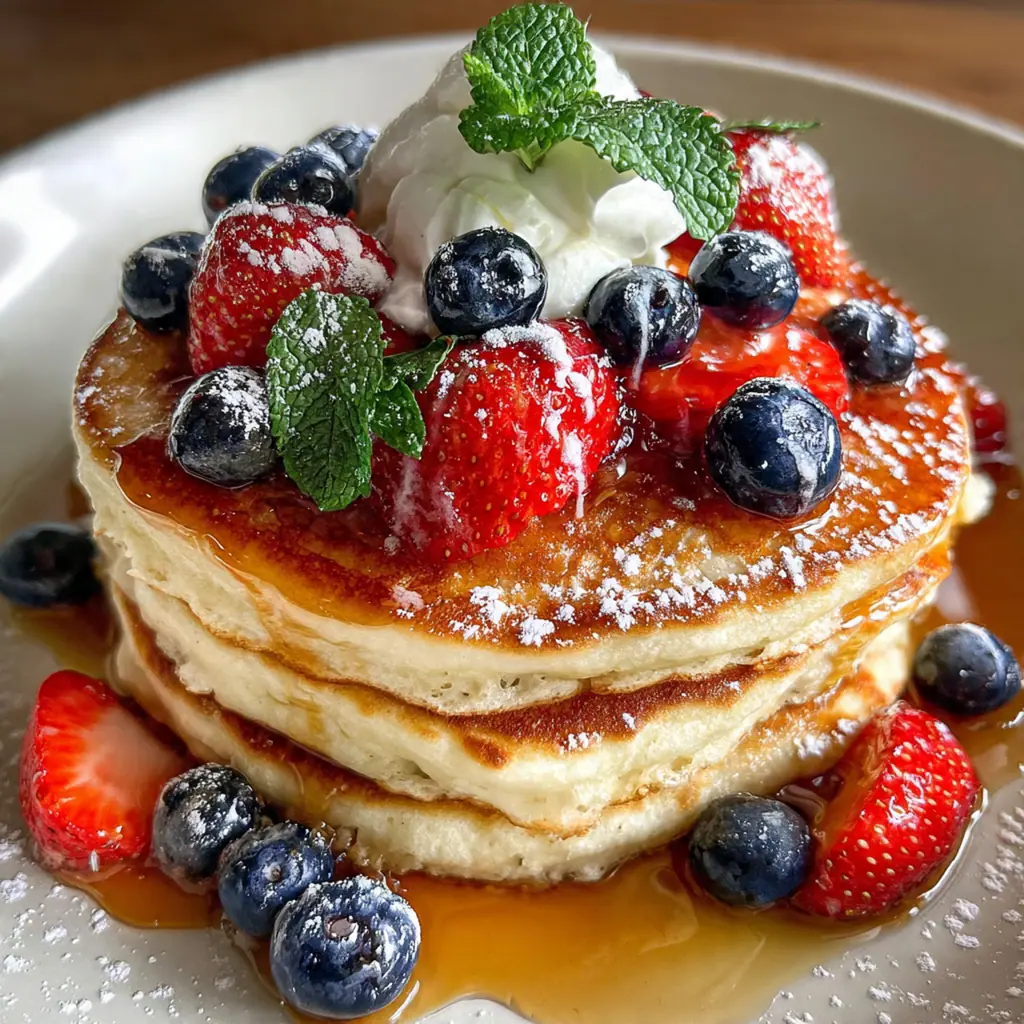
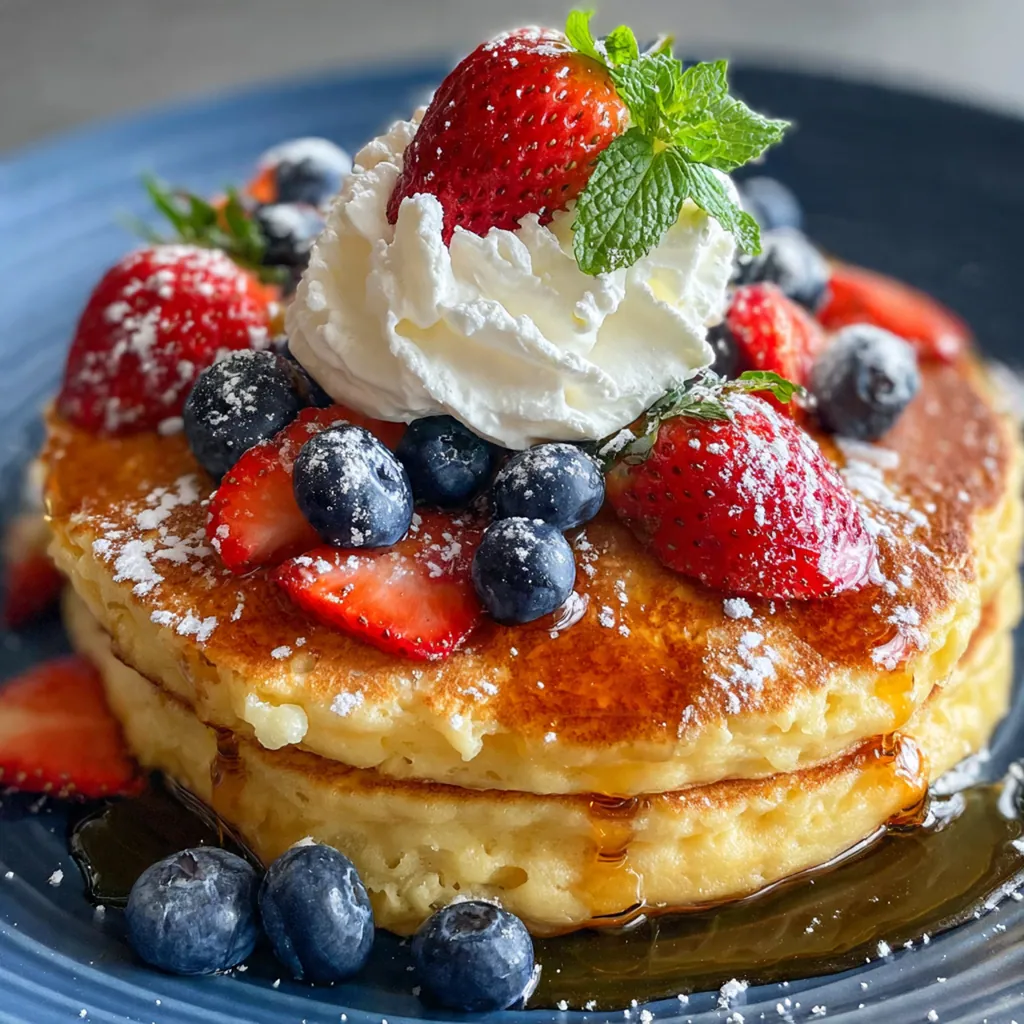
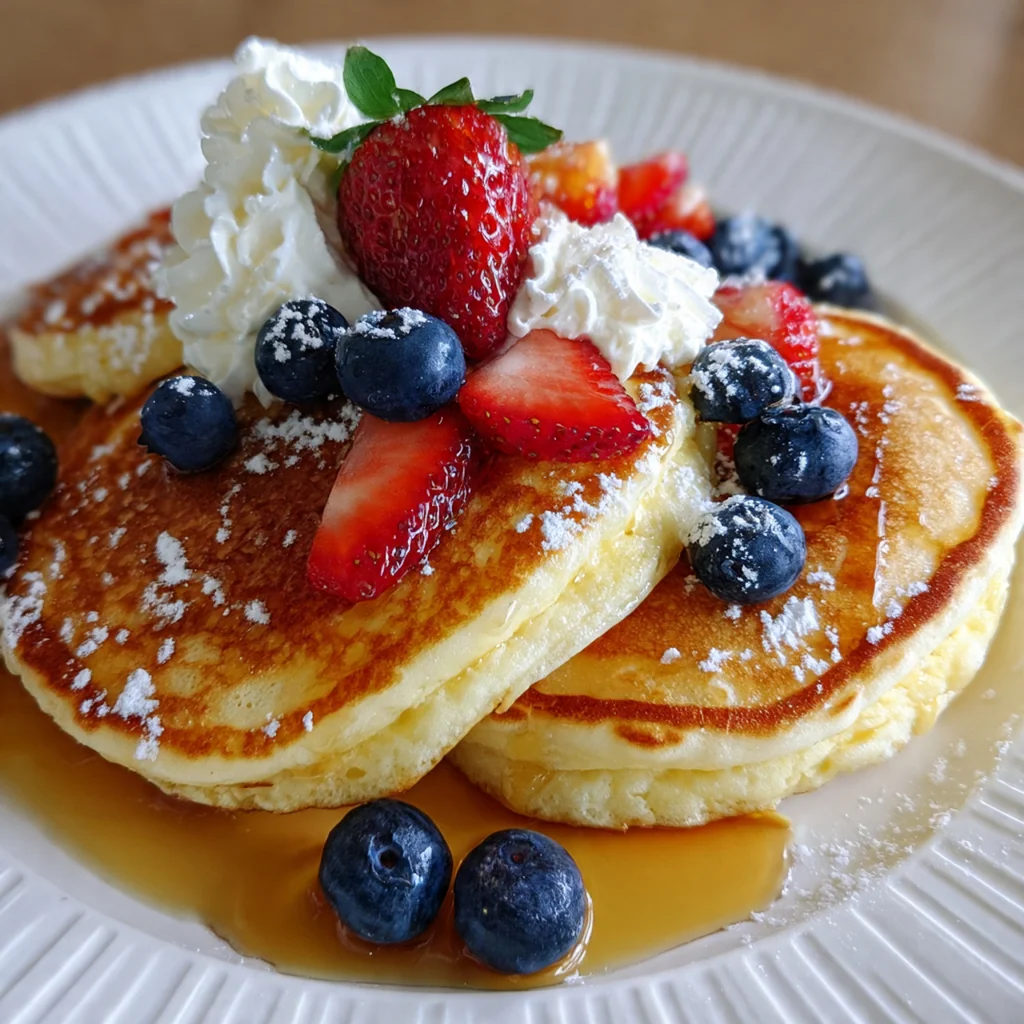
Pancakes with maple syrup have been my go-to weekend breakfast since I was a kid, and this recipe captures that perfect fluffy texture every time. As a classic American dish, it’s all about simple ingredients coming together to create something comforting and satisfying. You’ll find that making pancakes with maple syrup from scratch is quicker than you think, and the result is far superior to any mix. There’s something magical about that stack of golden-brown pancakes dripping with sweet syrup that just starts the day right.
Why You'll Love This Recipe
- Fluffy, tender pancakes that practically melt in your mouth
- Uses pantry staples you probably already have
- Ready in just 30 minutes from bowl to plate
- Easily add chocolate chips or berries for a personal touch
- Everyone at the table will ask for seconds
Ingredients You’ll Need
- All-purpose flour: This is the foundation of your pancakes, providing structure for that fluffy rise. Use unbleached all-purpose flour and spoon it into your measuring cup to avoid packing it down.
- Baking powder: This leavening agent is what gives your pancakes their airy lift. Make sure it’s fresh by testing it with hot water—if it fizzes, you’re good to go.
- Salt: A half teaspoon might seem small, but it balances the sweetness and enhances all the other flavors. I always use fine sea salt for even distribution.
- Granulated sugar: It adds a subtle sweetness and helps the pancakes caramelize to a beautiful golden brown. You can reduce it slightly if you prefer less sugar.
- Large eggs: They bind the batter together and add richness and color. Room temperature eggs incorporate more smoothly for a homogeneous batter.
- Whole milk: The fat in whole milk contributes to a tender, moist crumb and richer flavor. If you only have lower-fat milk, your pancakes will still work but might be slightly less tender.
- Unsalted butter, melted: Butter adds incredible flavor and richness. Melting it first ensures it blends evenly into the batter without creating cold lumps.
- Vanilla extract: This warm, aromatic ingredient rounds out the flavor profile. Pure vanilla extract makes a noticeable difference over imitation.
- Pure maple syrup: For serving, this is the classic companion. Look for 100% pure maple syrup, not pancake syrup, for the best depth of flavor.
- Additional butter: Used for greasing the griddle and serving, it adds a luxurious, buttery finish. Salted or unsalted both work here.
- Fresh berries: Optional toppings like blueberries or strawberries add a fresh, juicy contrast. Toss them in a little flour if adding to the batter to prevent sinking.
- Whipped cream: Another optional topping that makes breakfast feel decadent. A light swirl on top pairs perfectly with the maple syrup.
How to Make It
Mix the Dry Ingredients:
Grab a large mixing bowl and whisk together the flour, baking powder, salt, and sugar. You’re doing this first to aerate the dry ingredients and ensure the leavening is evenly distributed. I like to whisk for a good 30 seconds to break up any clumps, which helps prevent bitter spots in your finished pancakes with maple syrup.
Combine the Wet Ingredients:
Crack the eggs into a medium bowl and beat them lightly with a whisk until the yolks and whites are just combined. Then pour in the milk, melted butter, and vanilla extract. Whisk everything until it’s smooth and emulsified; this step creates a uniform liquid base that will hydrate the dry mix evenly.
Form the Batter:
Now, pour the wet ingredients into the bowl with the dry ingredients. Use a wooden spoon or rubber spatula to gently fold the mixture together. Stir until the flour is just moistened and the batter is still slightly lumpy—this is crucial. Overmixing develops the gluten in the flour, which can make your pancakes tough instead of tender and fluffy.
Heat Your Cooking Surface:
Place your griddle or large non-stick skillet over medium heat and let it preheat thoroughly. If you’re using an electric griddle, set it to 350°F. To test if it’s ready, flick a few drops of water onto the surface; they should dance and sizzle. Then, lightly grease the surface with a bit of butter using a pastry brush or paper towel. This butter not only prevents sticking but also adds flavor and promotes a beautiful golden-brown color.
Pour and Cook the First Side:
Once the griddle is hot, pour about 1/4 cup of batter for each pancake, leaving some space between them so they don’t run together. Let them cook undisturbed until you see bubbles forming on the surface and the edges look dry and set, which usually takes 2 to 3 minutes. This bubbling is the baking powder doing its job, and it’s your signal that the bottom is perfectly cooked.
Flip and Cook the Second Side:
Slide a thin, flexible spatula under each pancake and flip it confidently in one quick motion. You’ll see the cooked side should be a lovely golden brown. Cook the second side for about 1 to 2 minutes, until it’s also golden brown. Resist the urge to press down with the spatula, as that squeezes out air and makes the pancakes dense.
Keep Pancakes Warm:
As the pancakes finish cooking, transfer them to a plate and cover loosely with aluminum foil. This creates a warm, steamy environment that keeps them soft and prevents them from drying out while you cook the rest of the batch. If you’re making a big stack, you can keep them in a single layer on a baking sheet in a 200°F oven instead.
Serve Immediately:
Pile the warm pancakes onto plates and drizzle generously with pure maple syrup. Add a pat of butter on top so it melts into rivulets, and scatter fresh berries or a dollop of whipped cream if you like. Pancakes with maple syrup are best enjoyed hot, right after cooking, when they’re at their fluffiest and most inviting.
You Must Know
- Let the batter rest for fluffier pancakes
- A slightly lumpy batter is a good thing
- Use a hot griddle for even browning
- I always use real maple syrup for the best flavor
Storage Tips
Store any leftover pancakes in an airtight container in the refrigerator where they’ll keep for up to three days, or freeze them flat on a baking sheet before sealing in a freezer bag for up to two months. To reheat, I prefer the toaster for a crispy exterior, but a low oven (around 300°F) for 5-7 minutes works great too, or just microwave them for 20-30 seconds if you’re short on time. They might not be as fluffy as day one, but they’re still a fantastic quick breakfast you can enjoy on busy mornings.
Ingredient Substitutions
If you need a gluten-free version, swap the all-purpose flour for a 1:1 gluten-free blend—just check that it contains xanthan gum for structure. For dairy-free pancakes, use your favorite plant-based milk like almond or oat, and replace the butter with a neutral oil like canola or melted coconut oil. If eggs are an issue, a flax egg (1 tablespoon ground flax mixed with 3 tablespoons water per egg) or a commercial egg replacer works well. The vanilla is optional but highly recommended for that classic flavor, and you can always adjust sweetness to taste.
Serving Suggestions
For a hearty breakfast, pair these pancakes with maple syrup with crispy bacon or savory sausage links and a side of scrambled eggs—the sweet and salty combo is unbeatable. If you want something lighter, a fresh fruit salad with berries and a dollop of yogurt adds a refreshing touch. You can also turn them into a brunch centerpiece by setting out a toppings bar with whipped cream, chopped nuts, and extra maple syrup so everyone can customize their stack. Don’t forget a hot cup of coffee or orange juice to round out the meal.
Cultural Context
Pancakes with maple syrup hold a special place in American food tradition, evolving from simple frontier fare to a beloved breakfast staple. Early settlers learned from Indigenous communities how to tap maple trees for syrup, pairing it with griddle cakes made from basic pantry staples. This combination became a symbol of hearty, home-cooked meals, often featured in diners and family restaurants as an all-day breakfast option. Today, it’s a ritual for weekend mornings, holiday gatherings, and lazy days, representing comfort and connection. The dish’s popularity endures because it’s endlessly adaptable yet consistently comforting, a taste of home no matter where you are.
Pro Tips
- Let the batter rest for 5-10 minutes before cooking for extra fluffiness
- Avoid overmixing to keep the pancakes tender and light
- Keep finished pancakes warm in a 200°F oven while you cook the rest
- Use a measuring cup with a spout for perfectly round pancakes
- I always test one pancake first to adjust the heat
Frequently Asked Questions
All-purpose flour is the best choice for these classic Pancakes with Maple Syrup. It provides the ideal structure for achieving fluffy, tender pancakes that still have enough body to soak up all that delicious maple syrup without falling apart.
Absolutely! You can mix the dry ingredients the night before. In the morning, just whisk together the wet ingredients, combine, and cook. Leftover cooked pancakes freeze beautifully—just pop them in the toaster for a quick, hot breakfast.
Any milk will work, including buttermilk, 2%, or even non-dairy alternatives like almond or oat milk. Buttermilk will add a delightful tang, while other milks will yield a slightly lighter flavor that lets the pure maple syrup shine.
Wait until you see bubbles form and pop on the surface of the pancake and the edges look set and slightly dry, which usually takes about 2-3 minutes over medium heat. The bottom should be a perfect golden brown before you flip it.
They’re fantastic on their own, but you can create a classic American diner breakfast by adding crispy bacon, scrambled eggs, or fresh seasonal fruit like berries or sliced bananas for a burst of freshness.