

This Classic Raspberry Lemon Pie is a summer masterpiece that perfectly balances the zesty punch of fresh lemon with the lush sweetness of ripe berries, all nestled in a buttery, flaky crust. It’s a quintessential American dessert that turns simple, vibrant ingredients into a showstopping treat. I’ve found it’s the pie that always disappears first at any potluck or family dinner. You’ll love how the straightforward techniques yield a result that looks and tastes truly special, with that irresistible harmony of tart and sweet in every single slice.
Why You'll Love This Recipe
- The bright lemon and sweet raspberry combo is completely irresistible
- You get a from-scratch, flaky butter crust that’s absolutely worth the effort
- It finds that perfect balance between tart and sweet every single time
- Looks incredibly impressive but uses straightforward, approachable techniques
- My summer isn’t complete without making this at least once
Ingredients You’ll Need
- All-purpose flour: This is the foundation of your crust, providing the structure and that tender, flaky bite we all love. Stick with a reliable, unbleached brand for consistent results.
- Salt: A pinch in the crust balances the fat, and a little in the filling heightens all the fruity flavors. It’s a tiny ingredient that makes a huge difference.
- Cold unsalted butter: This is the secret to a flaky, tender crust. Keeping it cold means it creates steam pockets as it bakes. I always cube mine straight from the fridge.
- Ice water: The key word is ice. You need it super cold to keep the butter from melting as you mix the dough, ensuring maximum flakiness.
- Fresh raspberries: They bring the vibrant color, juicy texture, and that unmistakable berry flavor. Look for plump, brightly colored berries without any mushy spots.
- Granulated sugar: It sweetens the bright, tart filling and helps create that beautiful, glossy set with the cornstarch. It’s essential for the right texture.
- Cornstarch: This is your thickening agent, turning the juicy lemon and berry mixture into a sliceable, lush filling that holds its shape perfectly when cut.
- Large lemons: You want heavy ones that feel firm, as they’ll be packed with more juice. Their zest and juice are the soul of the pie’s bright flavor.
- Large egg yolks: They add richness and help thicken and stabilize the filling, giving it a lovely, creamy body without being too eggy.
- Egg white: Brushing this on the hot par-baked crust creates a seal that’s your best defense against a soggy bottom. Don’t skip it.
- Coarse sugar: Sprinkled on the crust edge, it adds a delightful crunch and a sparkling, professional finish. It’s a simple touch with big impact.
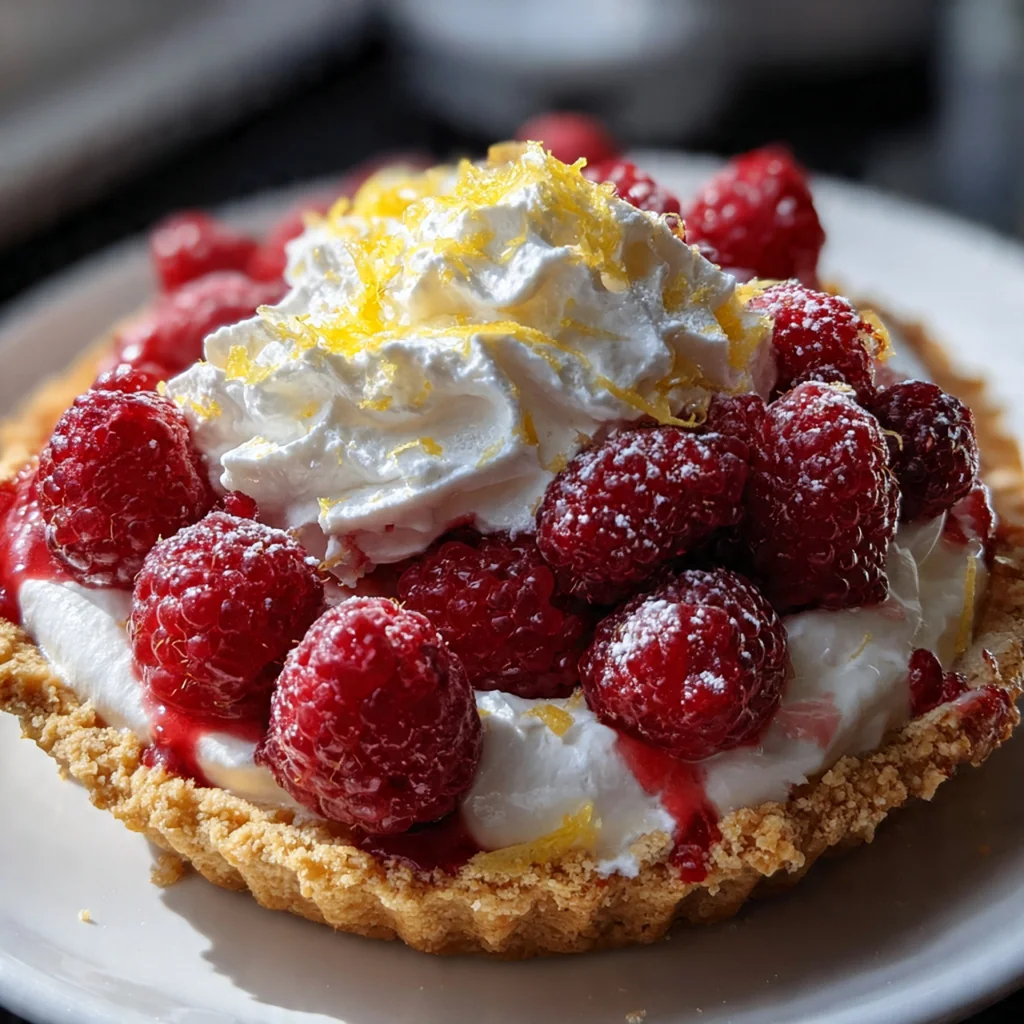
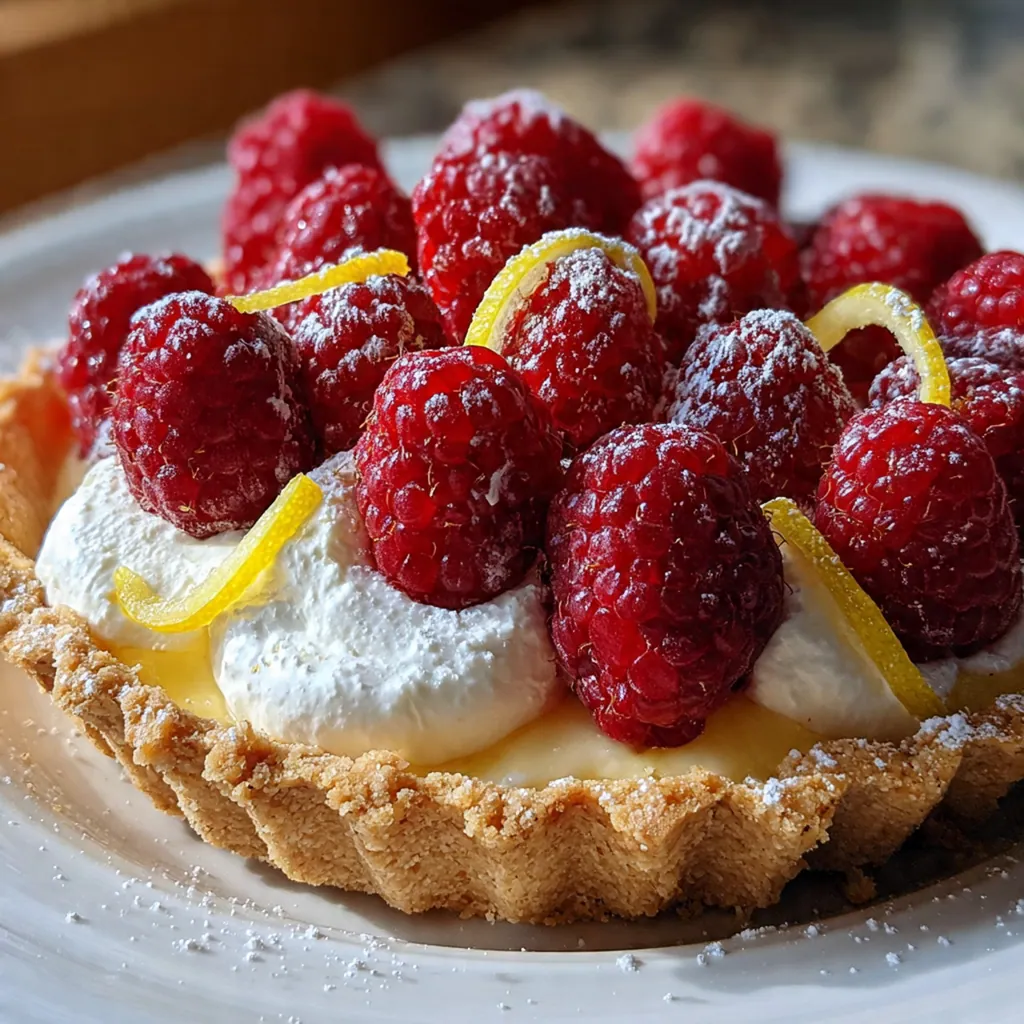
- Whipped cream: It’s the classic, cooling counterpoint to the vibrant, tangy filling. A dollop on each slice is pure heaven.
- Fresh mint leaves: A tiny garnish adds a pop of green color and a subtle, fresh aroma that makes the whole pie look even more inviting.
How to Make It
Make the Crust:
Start by whisking your flour and salt together in a big bowl. Cut in the cold, cubed butter using a pastry cutter or your fingertips until the mix looks like coarse peas with some larger butter bits remaining. Drizzle in the ice water, one tablespoon at a time, mixing with a fork just until the dough holds together when you pinch it. Shape it into a disk, wrap it tightly, and chill it for at least 30 minutes. This rest relaxes the gluten so your crust stays tender.
Par-Bake the Crust:
Preheat your oven to 375°F and roll your chilled dough on a floured surface into a 12-inch circle. Transfer it to your pie plate, trim the edges, and crimp them. Prick the bottom all over with a fork, line it with parchment and pie weights, and bake for 15 minutes. Pull out the parchment and weights, brush the hot crust with the beaten egg white, and bake for 5 more minutes. This step sets the structure and prevents sogginess.
Prepare the Lemon Base:
Reduce your oven temperature to 350°F. In a medium saucepan, whisk together the sugar, cornstarch, and salt. Zest both lemons right into this dry mix to infuse it with citrus oil, then juice them until you have a half cup. Whisk the lemon juice and egg yolks into the saucepan until everything is completely smooth and lump-free.
Cook the Filling:
Place the saucepan over medium heat and cook, whisking constantly. You’ll see the mixture transform from thin and milky to thick and glossy, with large bubbles breaking the surface after about 7-10 minutes. Take it off the heat immediately and stir in the small pieces of butter until they melt completely. This butter adds a silky richness that balances the fruit’s acidity.
Fold in the Berries:
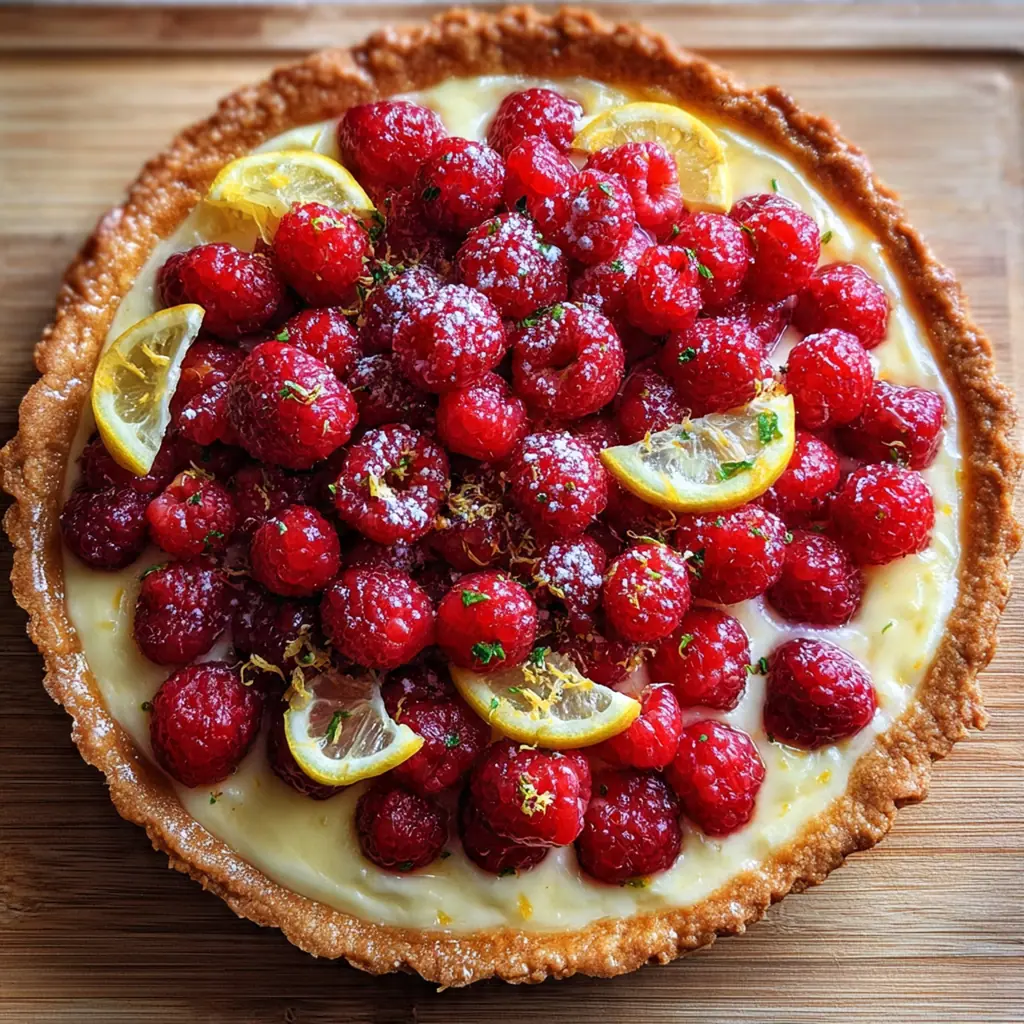
Gently fold three cups of the fresh raspberries into the warm, thick lemon filling. Be careful here—you want to incorporate them without completely mashing them, so you get lovely whole berry pockets throughout the pie. The residual heat will start to soften them just enough.
Assemble and Bake:
Pour the warm filling into your slightly cooled pie crust. Scatter the remaining cup of fresh raspberries evenly over the top. Place the pie on a baking sheet to catch any potential drips and bake at 350°F for 35-40 minutes. You’ll know it’s done when the filling is set and you see gentle, slow bubbles at the edges.
Cool Completely:
This is the most important step for a clean slice. Let the pie cool on a wire rack for at least 3 to 4 hours. The filling continues to set as it cools. For the absolute neatest cuts, I often chill it in the fridge for an extra hour before serving. The patience is tough but totally worth it.
You Must Know
- A cold butter crust is non-negotiable for flaky layers
- Brushing with egg white stops a soggy bottom completely
- Letting the pie cool fully is key for the filling to set
- Tart berries might need a touch more sugar
- It’s my favorite dessert to bring to a summer party
Storage Tips
You can keep your raspberry lemon pie loosely covered with plastic wrap or in a pie carrier at room temperature for up to one day, which is perfect for serving that same afternoon. For any longer, pop it in the refrigerator where it will stay fresh for up to three days, though the crust will gradually soften from the moisture of the filling. If I have leftovers, I actually love eating a cold slice straight from the fridge – the flavors are still fantastic.
Ingredient Substitutions
If fresh raspberries are out of season, you can use frozen ones without thawing; just toss them in a bit of the cornstarch from the recipe first to prevent extra liquid. For a gluten-free raspberry lemon pie, a good quality 1:1 gluten-free flour blend works perfectly in the crust. In a pinch, bottled lemon juice can replace fresh, but you’ll miss the vibrant flavor from the fresh zest, which is really the soul of the filling. If you’re out of coarse sugar, regular granulated sugar will still give the crust edge a slight sparkle and sweetness.
Serving Suggestions
Serve each slice of this pie at room temperature or slightly chilled, and I always add a generous dollop of freshly whipped cream or a scoop of high-quality vanilla bean ice cream to complement the bright, tangy filling. For a beautiful presentation, garnish the plate with a few extra fresh raspberries, a thin lemon slice, and a mint leaf. It pairs wonderfully with a cup of iced tea or a light sparkling wine, making it the ideal finish to a warm-weather meal.
Cultural Context
The fruit pie is a deeply rooted staple of American home baking, a symbol of hospitality and seasonal celebration. This raspberry lemon pie is a vibrant twist on that classic tradition, capturing the essence of summer in a pastry crust. It sits comfortably on the dessert table next to apple and cherry pie, but its bright, citrusy profile makes it feel uniquely fresh and modern. You’ll find similar celebrations of berry and citrus combinations in many regional desserts, but the simple, double-crust or custard-filled fruit pie remains a beloved centerpiece of gatherings across the country.
Pro Tips
- Roll your lemons firmly on the counter before juicing to get every last drop
- Chill your pie dough disk well before rolling for easier handling
- Use a baking sheet underneath to catch any bubbly drips
- Let the pie cool completely before you even think about slicing
- I always make the crust from scratch – it really does make all the difference
Frequently Asked Questions
Yes, you can substitute frozen raspberries. There’s no need to thaw them; just use them directly from the freezer to prevent excess liquid from making the filling too runny. You may need to add 1-2 extra minutes to the cooking time for the filling to thicken properly.
Absolutely! The pie can be baked, cooled completely, and then covered and refrigerated for up to 2 days before serving. For the best texture, let it sit at room temperature for about 30 minutes before slicing and serving.
If you don’t have cornstarch, you can use an equal amount of tapioca starch or arrowroot powder as a thickener. These alternatives work similarly to create a glossy, firm filling that holds its shape when sliced.
The pie is done when the crust is a deep golden brown and the filling is visibly bubbling through any vents or lattice. This bubbling is a key sign that the cornstarch has been activated and the filling has fully thickened.
A dollop of freshly whipped cream or a scoop of vanilla ice cream is a classic pairing that complements the pie’s bright, fruity flavors perfectly. For a lighter option, serve it with a sprinkle of powdered sugar and fresh mint.