

This is truly the easiest peanut butter fudge recipe you’ll find, a throwback to the simple, no-fuss treats that define American home baking. Forget candy thermometers and complicated techniques; this recipe is all about pure, creamy peanut butter bliss that melts in your mouth. I remember my grandmother making a version just like this for holiday gatherings, and its foolproof nature means you get perfect results every time. In just about 15 minutes of active work, you can create a classic confection that’s rich, smooth, and utterly satisfying, proving that the best desserts don’t have to be difficult.
Why You'll Love This Recipe
- Ready in only 15 minutes of hands-on time
- No candy thermometer or special tools needed
- Uses simple pantry staples you probably have now
- It’s a completely foolproof recipe for beginners
- This fudge has the richest, creamiest texture
Ingredients You’ll Need
- Unsalted butter: This creates a rich, creamy foundation and a melt-in-your-mouth texture. Using unsalted butter lets you control the final saltiness of the fudge perfectly.
- Light brown sugar: It adds a hint of molasses flavor that pairs beautifully with peanut butter. Make sure it’s packed firmly to get the right amount of sweetness and moisture.
- Whole milk: This ingredient helps dissolve the sugar and creates the liquid base for the fudge. Its fat content contributes to the overall creaminess of the final product.
- Creamy peanut butter: The star of the show! Use a commercial brand like Jif or Skippy for the best results, as their consistency ensures a smooth, never-oily fudge.
- Pure vanilla extract: Vanilla doesn’t just add its own flavor; it enhances the other ingredients, making the peanut butter taste richer and the fudge more aromatic.
- Fine sea salt: A small amount of salt is crucial for balancing the sweetness. It sharpens the peanut butter flavor and keeps the fudge from tasting flat.
- Powdered sugar: This is what gives the fudge its structure and sweetness. Sifting it is a non-negotiable step to guarantee a perfectly smooth, lump-free texture.
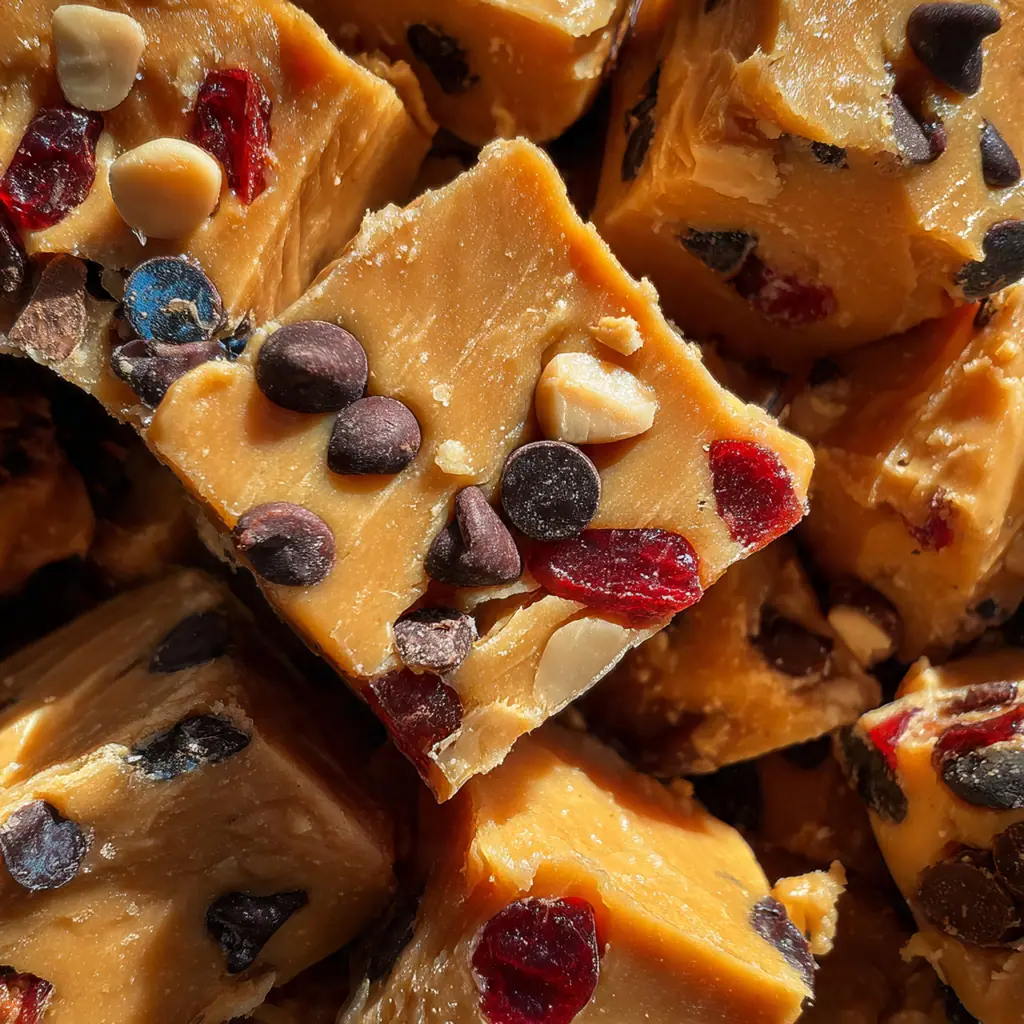
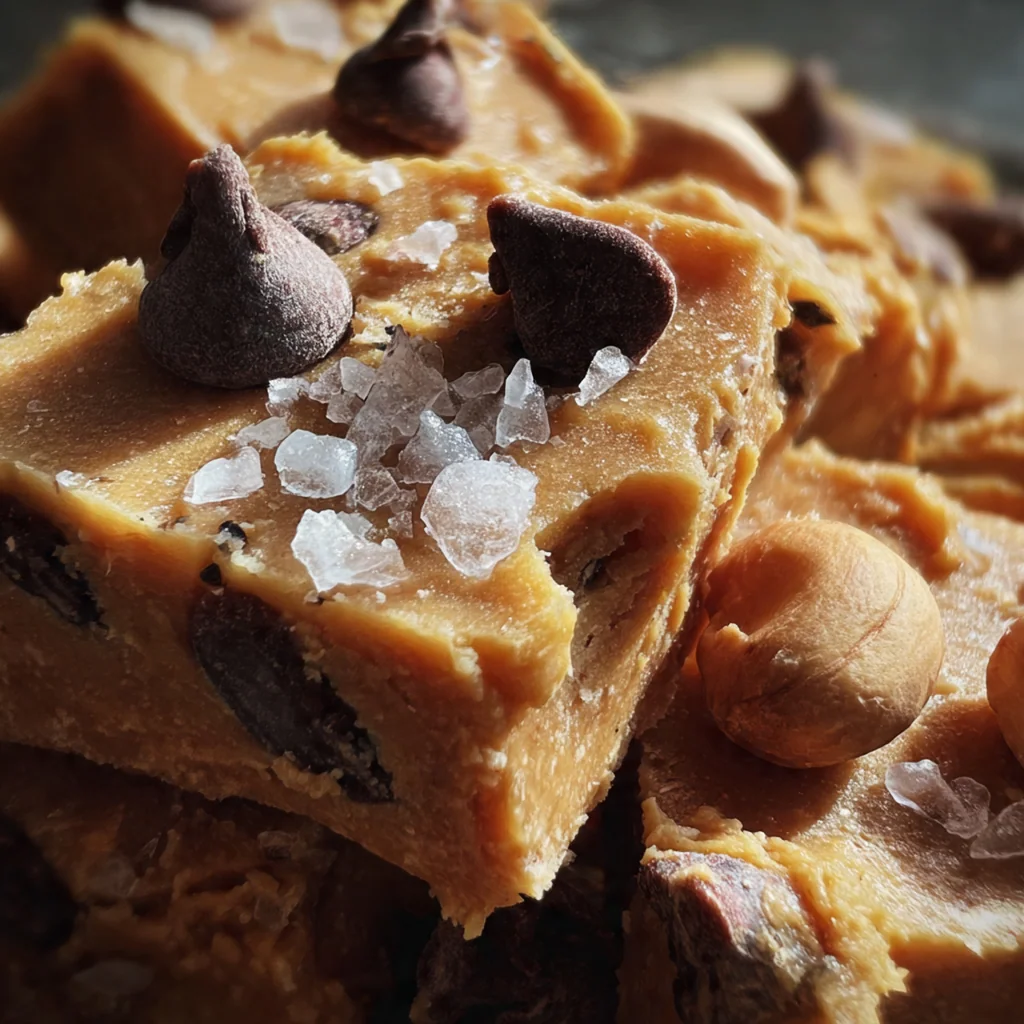
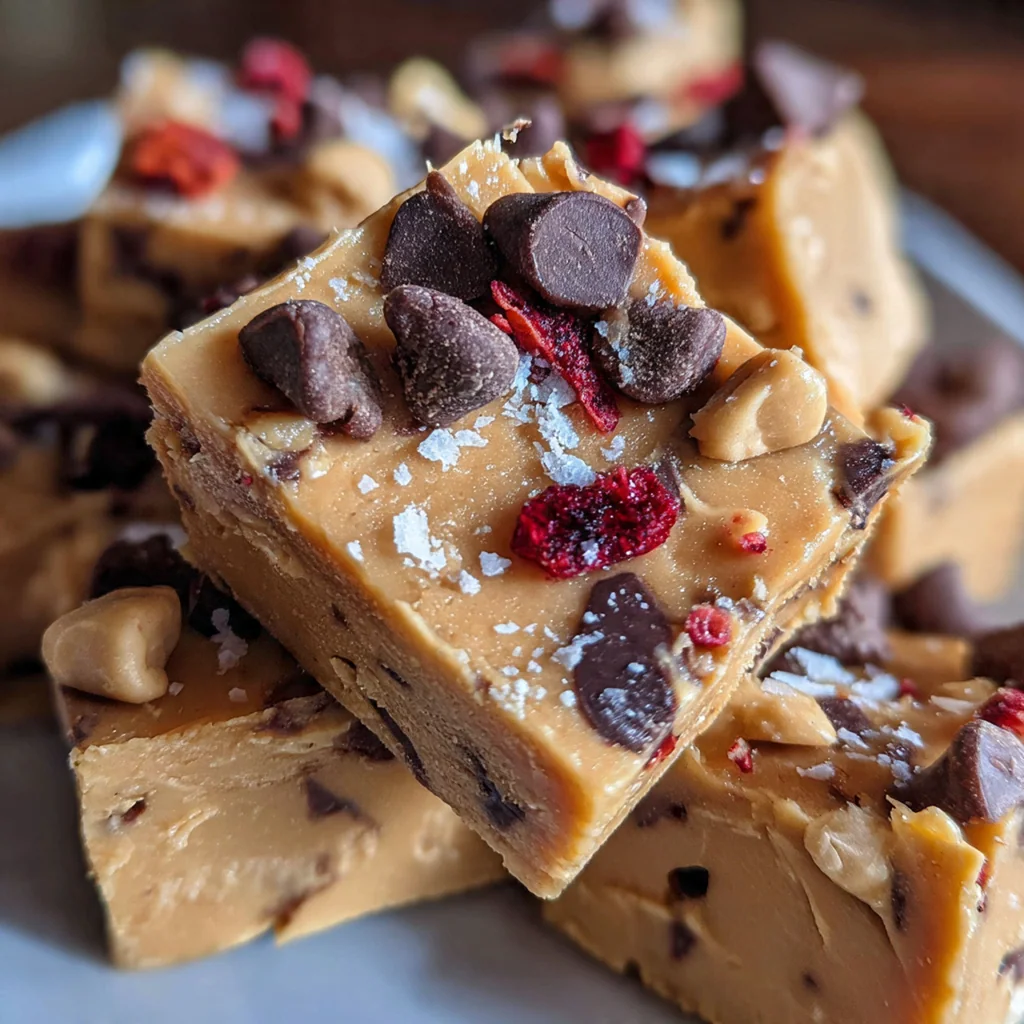
- Flaky sea salt: An optional but highly recommended finish. A little sprinkle on top provides a delightful crunch and a pop of savory contrast to the sweet fudge.
- Chopped roasted peanuts: For those who love a bit of texture, adding chopped peanuts on top gives a wonderful crunch that complements the creamy base.
- Mini chocolate chips: Peanut butter and chocolate are a classic combination. Sprinkling mini chocolate chips on top adds little bursts of chocolatey goodness in every bite.
How to Make It
Prepare Your Pan First:
Before you even turn on the stove, get your pan ready. Line an 8×8 inch baking pan with parchment paper, but let two opposite sides hang over the edge by about two inches. These overhangs will become your secret weapon, acting as handles to lift the fudge out cleanly later. It’s a simple trick that makes life so much easier. Once it’s lined, just set the pan aside so it’s ready to go when you are.
Create the Smooth Sugar Base:
In a medium saucepan, combine your unsalted butter pieces, the packed light brown sugar, and the whole milk. Place this over medium heat. As the butter melts, stir everything together. Your goal here is to gently heat the mixture and start dissolving the sugar into the milk and butter, creating a smooth, caramel-colored liquid that will be the foundation for your fudge.
Execute the Two-Minute Boil:
Now for the most important step. Bring the mixture to a full, rolling boil while stirring constantly. You can’t walk away during this part! Once it hits that rolling boil, start a timer for exactly two minutes. Keep stirring the entire time to prevent the bottom from scorching. This timed boil is the magic that ensures the sugar dissolves completely, giving you that ultra-creamy texture without any graininess. It’s the key to making the easiest peanut butter fudge.
Stir in the Flavor Makers:
As soon as the two-minute timer goes off, immediately remove the saucepan from the heat. Now you need to work quickly. Add the creamy peanut butter, pure vanilla extract, and fine sea salt directly into the hot mixture. Stir everything together vigorously until the peanut butter is completely melted and everything is well combined into a smooth, glossy sauce. The kitchen will start to smell amazing right about now.
Mix in the Powdered Sugar:
Here’s where you need to flex a little muscle. Add all of the sifted powdered sugar to the saucepan at once. Using a sturdy spatula or a wooden spoon, stir as fast as you can. The mixture will transform quickly, thickening up and starting to lose its glossy sheen. Keep stirring until you can’t see any more streaks of powdered sugar. The fudge will be very thick, like a stiff dough.
Spread the Fudge Mixture:
Don’t hesitate on this step. The moment the powdered sugar is incorporated, quickly scrape the thick fudge mixture out of the saucepan and into your prepared pan. Use the back of your spatula to push and spread it into an even, flat layer. It will start to set up almost immediately, so work fast to get it smooth before it becomes too firm to work with.
Add Your Favorite Toppings:
If you’re using any of the optional toppings, now is the time to add them. While the surface of the fudge is still soft and warm, sprinkle over your flaky sea salt, chopped roasted peanuts, or mini chocolate chips. After sprinkling, use your hand to gently press the toppings into the surface of the fudge. This ensures they’ll stick as it sets and won’t fall off when you slice it.
Chill Until Completely Firm:
Your work is almost done. Let the pan of fudge cool on the counter for about 30 minutes to let some of the initial heat dissipate. Then, transfer the entire pan to the refrigerator. Let it chill for at least two hours, or until it’s completely firm all the way through. This chilling step is what allows the fudge to set up properly for perfect slicing.
Lift, Slice, and Serve:
Once the fudge is fully chilled and firm, grab the parchment paper overhangs and lift the entire block of fudge out of the pan and onto a cutting board. For the best, creamiest texture, let it sit at room temperature for about 15 minutes before you slice it. Use a large, sharp knife to cut it into 36 small squares. This easiest peanut butter fudge is now ready to be enjoyed.
You Must Know
- Use commercial peanut butter for the best texture
- Sifting your powdered sugar is absolutely essential
- That two-minute boil is the secret to success
- I always set a timer so I don’t guess
Storage Tips
Storing this easiest peanut butter fudge is simple. Keep your cut squares in an airtight container to maintain their freshness and creamy texture. If you need to stack them, place a layer of parchment or wax paper between each layer to prevent them from sticking together. The fudge will stay perfectly delicious at room temperature for up to one week. If you need it to last longer, you can store it in the refrigerator for up to three weeks. I personally think it has the best flavor and softest bite when served at room temperature, so I just pull it out of the fridge a few minutes before serving.
Ingredient Substitutions
While this recipe for the easiest peanut butter fudge is pretty perfect as is, you do have a couple of options. If you need to make it dairy-free, you can easily swap the unsalted butter for a high-quality plant-based butter stick and use an unsweetened plant-based milk like almond or soy milk in place of the whole milk. The results will be just as creamy. While the recipe calls for creamy peanut butter for the smoothest texture, you could use chunky peanut butter if you want little bits of peanuts throughout the fudge itself, in addition to any you sprinkle on top. Just be sure to still use a commercial brand, not a natural one.
Serving Suggestions
This easiest peanut butter fudge is a true standout on any holiday dessert platter, nestled next to cookies and candies. It’s also the perfect simple treat to bring to a bake sale or potluck, since it’s always a crowd-pleaser. My favorite way to enjoy it is with a cold glass of milk or a hot cup of coffee for a perfect afternoon pick-me-up. For an extra-decadent dessert, try chopping a few squares into small pieces and stirring them into your favorite vanilla bean ice cream. The creamy fudge pieces create an amazing texture contrast against the cold ice cream.
Cultural Context
Fudge holds a special place in the heart of American confectionery, evoking feelings of nostalgia, holidays, and old-fashioned candy shops. Its origins are often traced back to the late 19th century at American women’s colleges, where it was made as a sweet, rich treat. Traditional fudge making is a precise science involving candy thermometers and careful cooling to achieve the right crystal structure. This recipe for the easiest peanut butter fudge is a modern evolution of that tradition, born from a desire to capture that homemade taste without the fuss. It represents the best of American home baking: accessible, reliable, and incredibly satisfying, making a beloved classic available to even the most novice of candy makers.
Pro Tips
- Don’t eyeball the 2-minute boil, use a timer
- Work fast once the powdered sugar goes in
- The parchment paper handles are a game-changer
- For clean cuts, wipe your knife between slices
- I always let it warm up a bit before serving
Frequently Asked Questions
For the creamiest, no-fail texture in this Easiest Peanut Butter Fudge, it’s best to use a commercial, stabilized creamy peanut butter like Jif or Skippy. These brands don’t have the natural oil separation that organic peanut butters do, which ensures your fudge sets up perfectly smooth and won’t become oily or grainy. Using these guarantees that classic, melt-in-your-mouth consistency.
Absolutely! This Easiest Peanut Butter Fudge is a perfect make-ahead dessert. Once it’s fully set, you can store it in an airtight container at room temperature for up to a week. For longer storage, you can refrigerate it for up to three weeks. Just let it sit at room temperature for a few minutes before serving for the best texture.
If you don’t have light brown sugar for this Easiest Peanut Butter Fudge, you can easily substitute it with dark brown sugar for a slightly richer, more molasses-forward flavor. In a pinch, you could also use an equal amount of granulated white sugar, though the fudge may lose a bit of its classic caramel undertone and soft texture. Sticking with brown sugar is recommended.
For this Easiest Peanut Butter Fudge, the stovetop step is very quick. After combining the butter, brown sugar, and milk, you’ll heat it just until the butter is fully melted and the sugar has dissolved. The mixture should look smooth and be gently bubbling around the edges. This usually takes just 2-3 minutes over medium heat. You don’t need to bring it to a hard boil.
This Easiest Peanut Butter Fudge is a rich, standalone American treat, perfect with a cold glass of milk or a hot cup of coffee. For a holiday dessert platter, it pairs wonderfully with chocolate crinkle cookies, classic brownies, or peppermint bark. It’s also a fantastic addition to a bake sale table alongside other simple, crowd-pleasing sweets.