

This Pumpkin Dump Cake is the ultimate easy dessert that defines comfort food for me every autumn. It’s a classic American treat that layers a spiced pumpkin custard with a buttery, crunchy topping, all without any complicated mixing. You literally just dump the ingredients into the pan and let the oven work its magic. I love how the aroma of cinnamon and nutmeg fills my kitchen, promising a slice of pure coziness with minimal effort.
Why You'll Love This Recipe
- Incredibly easy to make with just layering and baking
- Uses simple pantry staples for a convenient dessert any day
- The contrast of creamy pumpkin and crispy topping is pure magic
- Feeds a crowd and is perfect for any fall gathering
- My family asks for this pumpkin dump cake every single year
Ingredients You’ll Need
- Pure pumpkin puree: This is the star of the show, providing that deep, earthy flavor and creamy texture. Be sure to grab the plain puree, not pumpkin pie filling, which is already sweetened and spiced.
- Evaporated milk: This concentrated milk gives the pumpkin layer a rich, custardy consistency that sets up perfectly. It’s what makes the texture so luscious and smooth.
- Large eggs: They act as the binder for the pumpkin mixture, helping it set into a firm, sliceable layer as it bakes. Room temperature eggs incorporate more smoothly.
- Granulated sugar: It sweetens the pumpkin base just enough to balance the warm spices without being overly sweet. This amount creates a perfect harmony with the spices.
- Ground cinnamon: The quintessential fall spice that brings warmth and a familiar cozy flavor to every single bite. It’s the backbone of the spice blend.
- Ground ginger: Adds a subtle, zesty kick that complements the pumpkin and other spices beautifully. It provides a little layer of complexity.
- Ground nutmeg: A little goes a long way to add a warm, nutty aroma and depth. I prefer freshly grated nutmeg for the brightest flavor.
- Ground cloves: This strong spice offers a hint of sweet intensity and rounds out the whole spice profile. Use it sparingly as it’s very potent.
- Salt: A crucial ingredient that enhances all the other flavors and keeps the dessert from tasting flat. It balances the sweetness perfectly.
- Yellow cake mix: The dry mix creates that iconic, irresistible crunchy and crumbly topping when combined with butter. It’s the ‘dump’ in dump cake.
- Unsalted butter: Melted and drizzled over the cake mix, it transforms the dry powder into golden, buttery clusters as it bakes. It’s the key to the crispy texture.
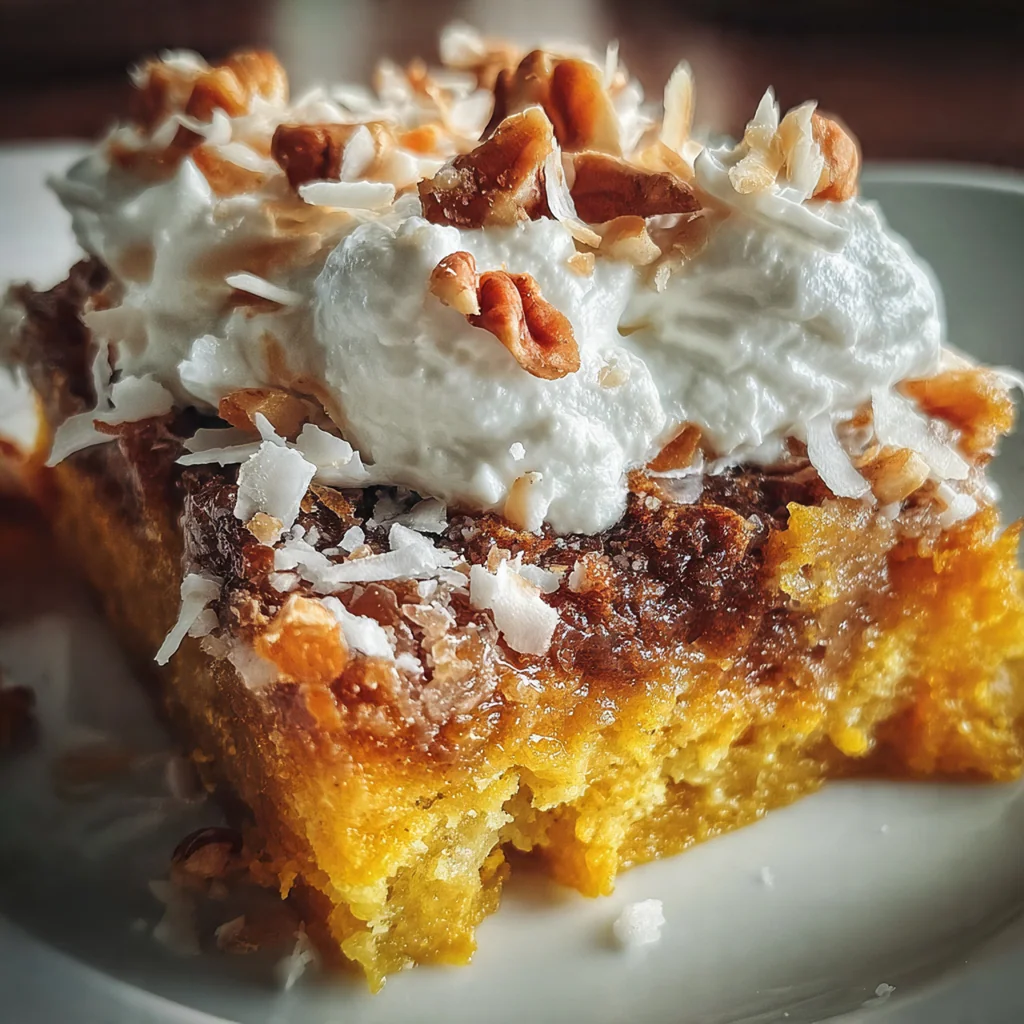
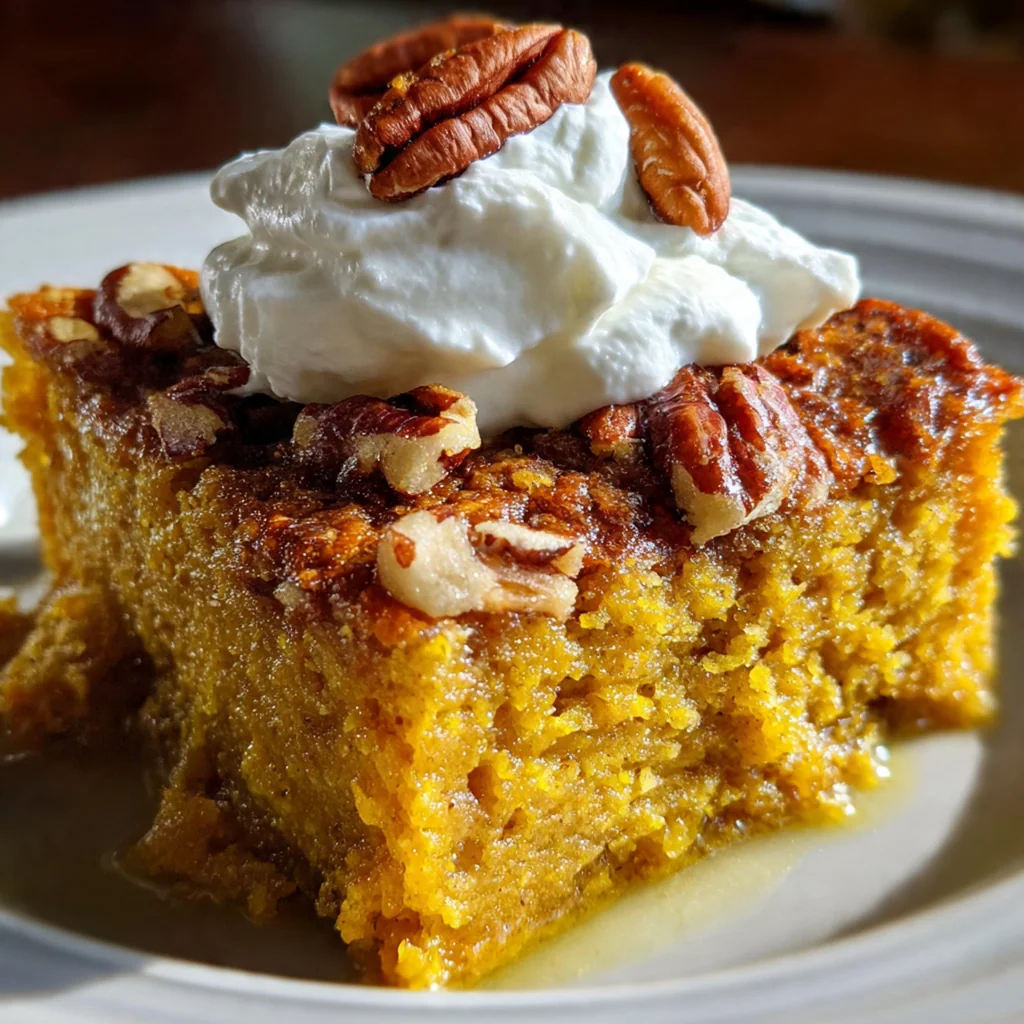
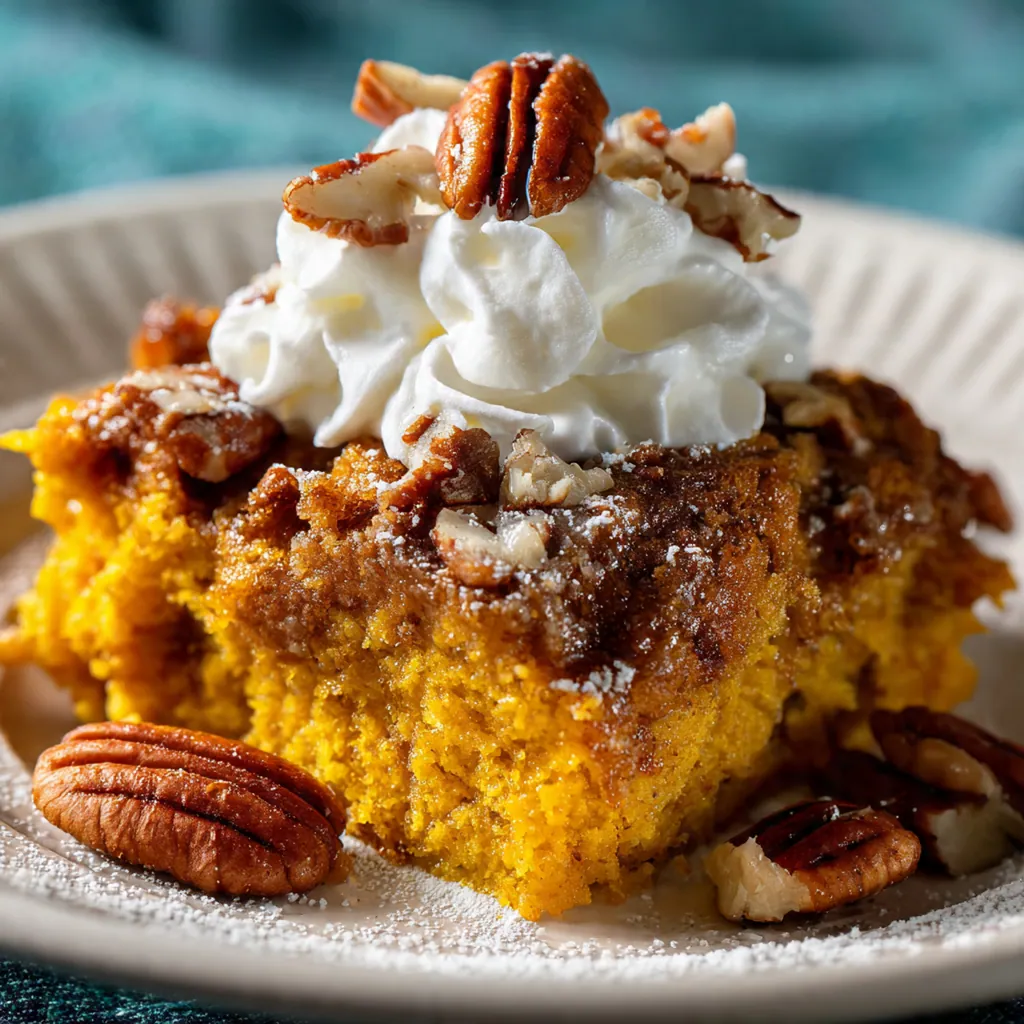
- Chopped pecans or walnuts: These are optional but add a wonderful toasted crunch and nutty flavor that takes the topping to another level. I always toast mine first.
- Vanilla ice cream: A classic pairing that melts into the warm cake, creating a perfect contrast of temperatures and textures. It’s my favorite way to serve it.
- Whipped cream: A lighter, fluffy alternative that adds a cool, creamy element without overpowering the warm spices of the cake itself.
How to Make It
Preheat and Prepare Your Pan:
Start by preheating your oven to 350°F and greasing a 9×13-inch baking dish. I always use butter for extra flavor, but non-stick spray works in a pinch. This simple step ensures your pumpkin dump cake releases easily and gets those deliciously crispy edges we all love.
Mix the Pumpkin Layer:
In a large bowl, whisk together the pumpkin puree, evaporated milk, eggs, sugar, and all the spices until you have a perfectly smooth, homogenous mixture. You want every bit of sugar and spice fully incorporated so every bite is balanced. Don’t rush this step – a smooth base is key.
Spread the Base Evenly:
Pour your beautiful pumpkin mixture into the prepared baking dish. Use a spatula to gently spread it into a perfectly even layer from corner to corner. An even base means everything bakes uniformly, so you don’t get thin or thick spots in your final cake.
Sprinkle the Cake Mix:
Open your box of yellow cake mix and sprinkle the entire dry powder evenly over the pumpkin layer. You’ll cover every inch in a light, sandy blanket. The most important thing here is to resist the urge to stir or mix it in – the layers are what make the magic happen.
Drizzle with Melted Butter:
Slowly and evenly drizzle the melted butter all over the top of the dry cake mix. Try to cover as much surface area as you can; I like to use a spoon to help distribute it. This butter is what creates those glorious, crispy golden bits as it bakes.
Add the Optional Nuts:
If you’re using nuts, now’s the time to sprinkle them evenly over the butter-drenched cake mix. They’ll toast up beautifully in the oven, adding an incredible layer of texture and flavor. This is my favorite little upgrade for a bit of extra crunch.
Bake Until Golden and Bubbly:
Place the dish in your preheated oven and bake for 50 to 60 minutes. You’ll know it’s done when the top is a deep, golden brown and the edges are actively bubbling. The center should be set, not jiggly.
Cool for the Perfect Set:
Remove the cake from the oven and place the whole dish on a wire rack to cool. Let it sit for at least 30 minutes before you even think about cutting into it. This cooling time is non-negotiable – it allows the custardy pumpkin layer to firm up perfectly for clean slices.
Serve and Enjoy:
Slice your pumpkin dump cake into generous squares and serve it warm or at room temperature. This is when you add that scoop of vanilla ice cream or dollop of whipped cream for the full, decadent experience. Dig in and enjoy the perfect mix of creamy and crunchy.
You Must Know
- Always use plain pumpkin puree, not the pie filling
- Let the cake cool completely so the layers set properly
- The butter drizzle is what creates the iconic crispy topping
- I never skip toasting the nuts when I add them
Storage Tips
Store any leftover pumpkin dump cake covered tightly in the baking dish or transferred to an airtight container in the fridge, where it’ll stay perfect for up to four days. To reheat, I prefer the oven at 300°F for 10-15 minutes to revive that crispy topping, though the microwave works in 30-second bursts if you’re in a hurry. You can also freeze the whole cake or individual slices wrapped tightly in plastic and foil for up to two months; just thaw it overnight in the refrigerator before reheating. The topping may soften a bit after storage, but the flavor is still absolutely wonderful.
Ingredient Substitutions
If you’re out of evaporated milk, you can use an equal amount of half-and-half or even whole milk in a pinch, though the texture will be slightly less rich. For a gluten-free version, simply swap the yellow cake mix for a certified gluten-free brand and double-check that your other ingredients are gluten-free. You can use salted butter instead of unsalted, but I’d recommend omitting the added salt in the pumpkin mixture to avoid over-salting. Any neutral oil can stand in for the melted butter on the topping, but the flavor won’t be as rich. Feel free to swap the pecans for walnuts, pepitas, or even a sprinkle of rolled oats for a different crunch.
Serving Suggestions
I love serving this warm with a big scoop of high-quality vanilla ice cream that melts into all the nooks and crannies of the crispy topping. A dollop of freshly whipped cream with a dusting of cinnamon is a lighter, equally delicious option. Pair a slice with a hot mug of coffee, spiced chai tea, or even a glass of cold apple cider for the ultimate cozy fall treat. It’s also fantastic at room temperature, making it an ideal make-ahead dessert for potlucks or holiday dinners where you want something effortlessly impressive.
Cultural Context
The dump cake is a wonderfully practical American invention that gained huge popularity in the mid-20th century, particularly in the South and Midwest, as a symbol of easy, no-fuss home baking. This pumpkin version is a seasonal twist on that classic concept, marrying the comforting, spiced flavor profile of a traditional pumpkin pie with the convenience of a boxed cake mix. It’s a dessert born from home cooks wanting to create something shareable and satisfying with minimal time and effort, often featured in community cookbooks and at church suppers. The beauty of a pumpkin dump cake lies in its humble, straightforward approach – it proves that the most beloved recipes are often the simplest ones that bring people together.
Pro Tips
- Toast your nuts first for a deeper, richer flavor
- Ensure the butter is drizzled as evenly as possible
- Let it cool fully before cutting for the cleanest slices
- Check for doneness when the top is deeply golden
- I always use a glass dish so I can see the bottom
Frequently Asked Questions
Always use 100% pure pumpkin puree, not pumpkin pie filling. Pumpkin pie filling has added sugars and spices that will throw off the flavor and texture of your Pumpkin Dump Cake. The recipe’s specific spice blend is designed to work with the plain puree.
Absolutely! You can assemble the Pumpkin Dump Cake, cover it tightly, and refrigerate it for up to 24 hours before baking. Let it sit at room temperature for 30 minutes before putting it in the oven. It also stores beautifully after baking for 2-3 days at room temperature.
For a similar rich, creamy texture in your Pumpkin Dump Cake, you can use half-and-half or heavy cream mixed with a splash of milk. While the result will be slightly different, it will still be delicious. Avoid skim milk, as it will make the pumpkin layer too thin.
The Pumpkin Dump Cake is done when the top is a deep, golden brown and the edges are bubbling vigorously. A toothpick inserted into the pumpkin layer (not the topping) should come out clean, which takes about 50-55 minutes. The topping will be crisp and set.
This classic American dessert is fantastic on its own, but it’s even better warm with a scoop of vanilla ice cream or a dollop of freshly whipped cream. For a festive touch, a drizzle of caramel sauce or a sprinkle of extra chopped pecans adds wonderful texture and flavor.