

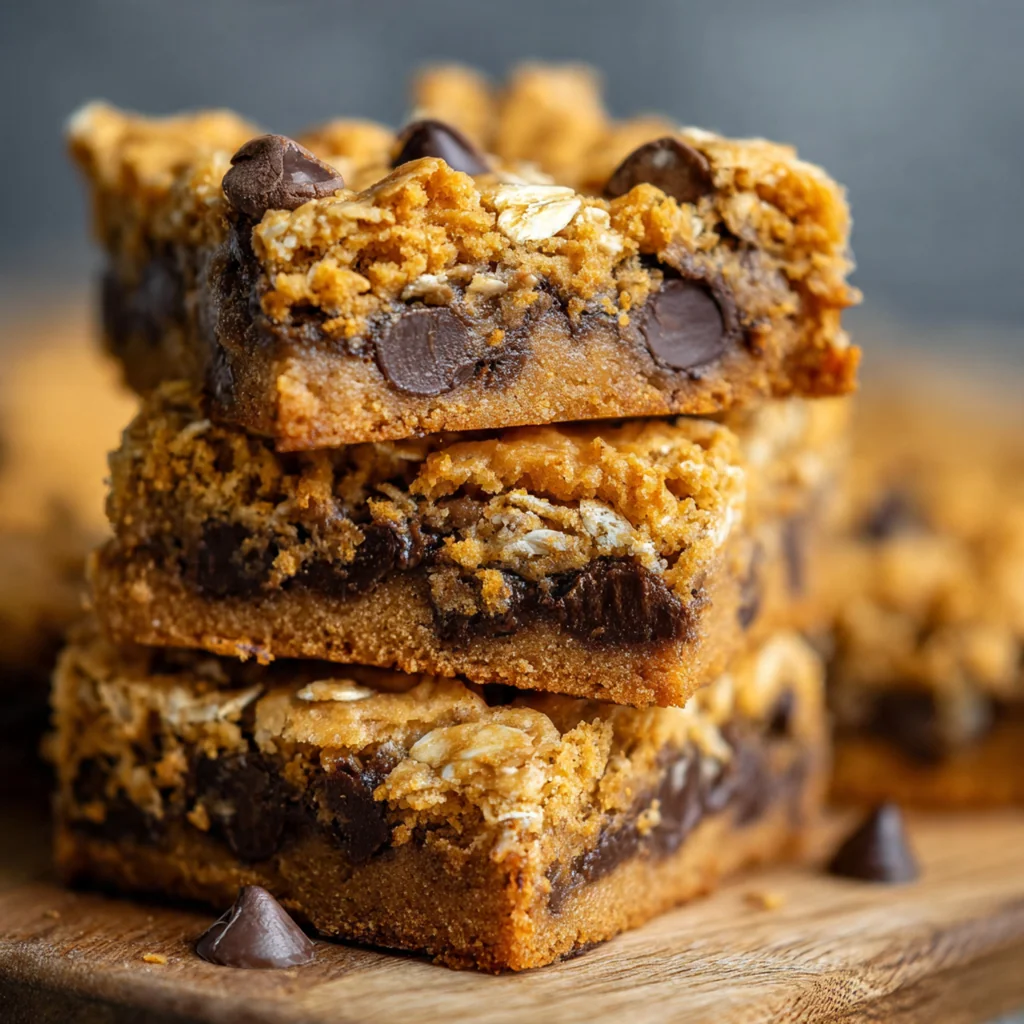
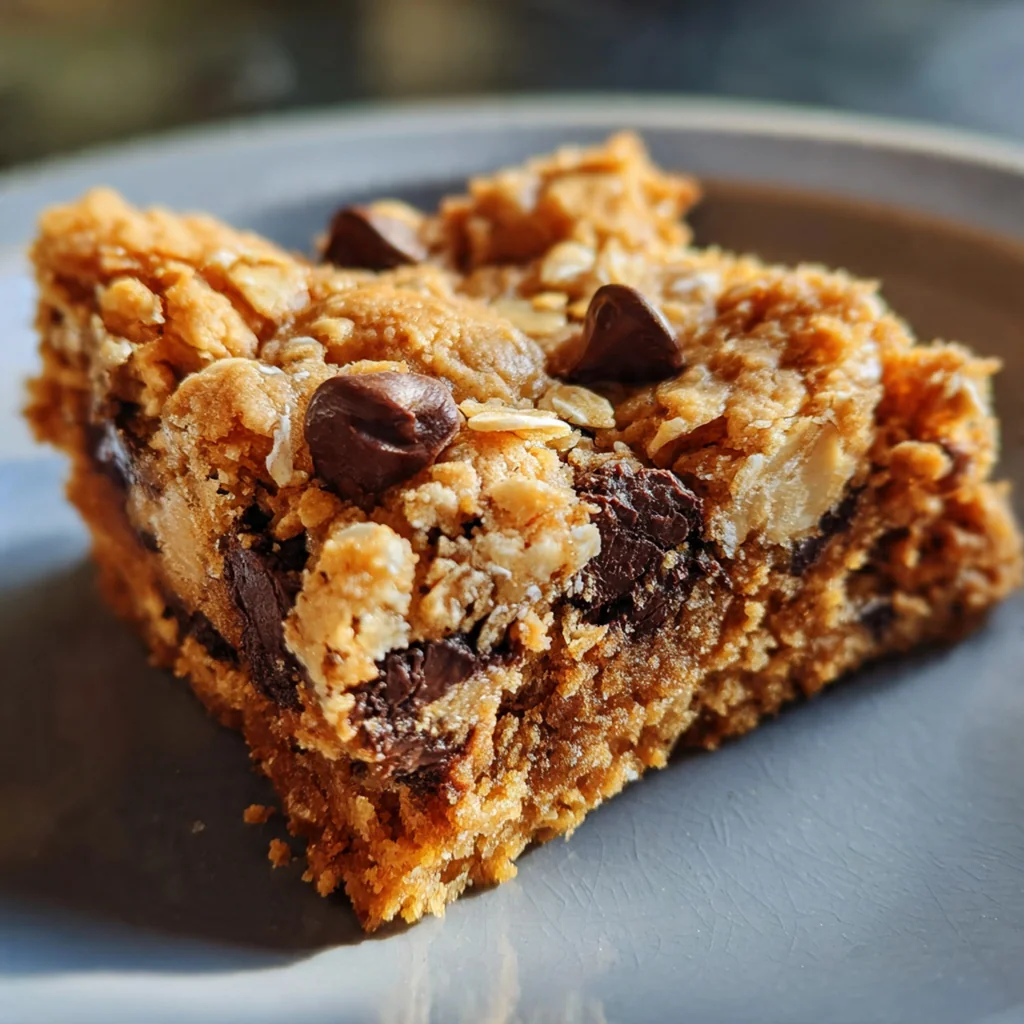
You’ll find these Peanut Butter Chocolate Chip Cookie Bars are the ultimate easy dessert that turns everyday ingredients into something extraordinary. These classic American treats capture that nostalgic combo of rich peanut butter and melty chocolate without any fuss. I’ve been making this exact recipe for years because it’s the one everyone always asks for again. It’s a foolproof crowd-pleaser that turns a 9×13 pan into pure comfort food magic.
Why You'll Love This Recipe
- No scooping individual cookies required for a whole pan of goodness
- That perfect sweet peanut butter and rich chocolate balance in every soft bite
- The chewy texture stays absolutely perfect for days after you bake them
- An incredibly simple dessert that feeds a crowd at any party or potluck
- Honestly, I don’t think I’ll ever make regular cookies again
Ingredients You’ll Need
- All-purpose flour: provides the essential structure for chewy bars that hold together beautifully, so don’t substitute with cake flour.
- Baking soda: gives the bars their perfect rise and that signature soft texture you’re craving.
- Salt: balances all that sweetness and enhances the chocolate and peanut butter flavors dramatically.
- Unsalted butter, softened: creates a rich, tender crumb and helps cream the sugars for that ideal cookie dough base.
- Creamy peanut butter: use a standard shelf-stable brand for the right consistency and that classic sweet, nutty flavor.
- Granulated sugar: adds sweetness and helps the edges of your bars get that lovely golden crisp.
- Packed light brown sugar: brings moisture, chew, and a subtle molasses note that makes these bars so special.
- Large eggs, at room temperature: bind everything together and contribute to the bars’ lift and soft structure.
- Vanilla extract: rounds out all the other flavors with its warm, aromatic sweetness in the background.
- Semi-sweet chocolate chips: my favorite for balancing sweetness, but they melt into glorious pockets of gooey chocolate.
- Chopped peanuts (optional): add a fantastic crunchy texture contrast and an extra punch of peanut flavor on top.
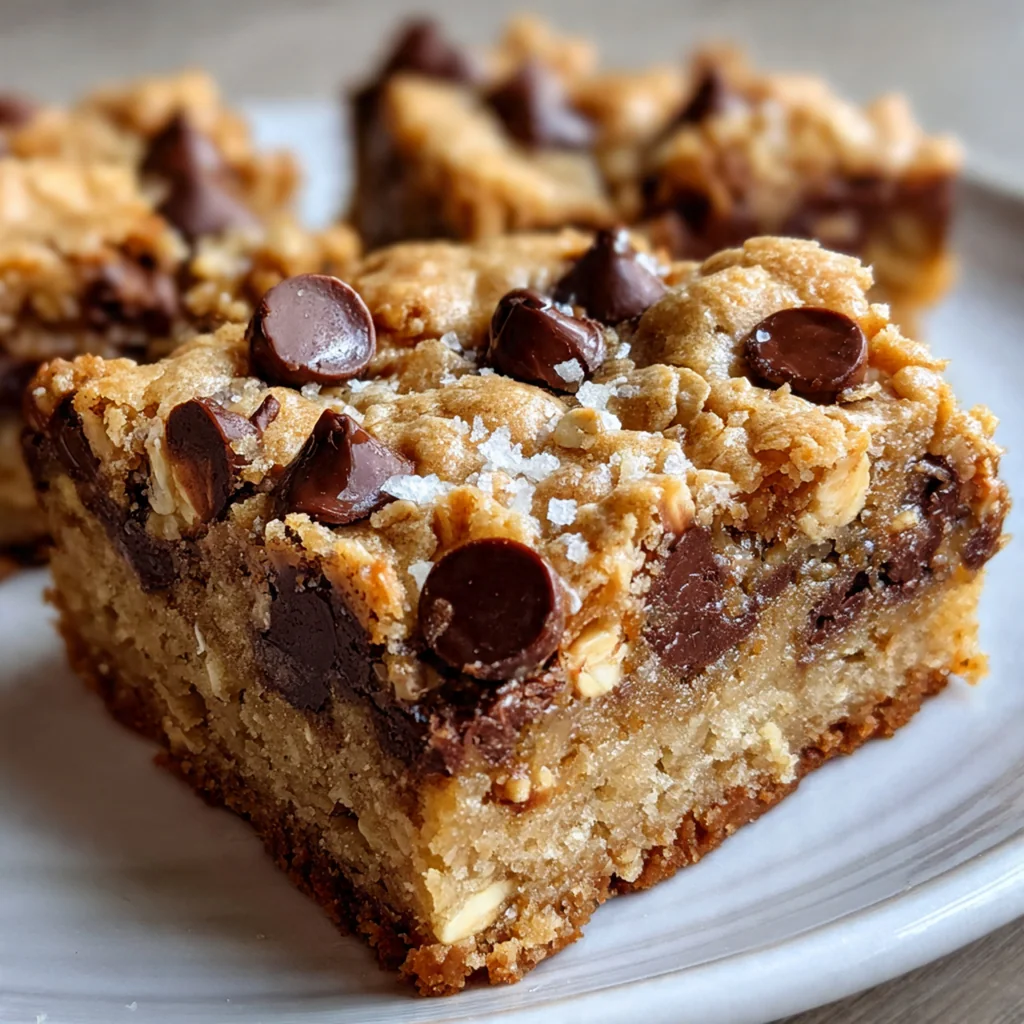
- Sea salt flakes (optional): a tiny sprinkle right before baking makes the chocolate taste even richer and more complex.
How to Make It
Preheat and Prepare Your Pan:
Start by preheating your oven to 350°F and greasing your 9×13 pan or lining it with parchment paper. Leaving an overhang on the parchment is my secret weapon for getting the whole slab out cleanly later. This simple step guarantees perfect squares every single time.
Whisk the Dry Ingredients:
Grab a medium bowl and whisk together your flour, baking soda, and salt until they’re completely uniform. You want those leavening agents distributed evenly so you don’t get any bitter pockets. Setting this mixture aside now makes the whole process flow so smoothly.
Cream the Butters and Sugars:
In a large bowl, use an electric mixer to beat the softened butter, peanut butter, and both sugars together. Keep it on medium speed for a good two to three minutes until it’s light and fluffy. This step incorporates air, which is key for the texture, so don’t rush it.
Incorporate Eggs and Vanilla:
Beat in the eggs one at a time, making sure each is fully blended into the batter before adding the next. This ensures a smooth, emulsified mixture. Then mix in the vanilla extract just until it’s combined – you’ll smell that wonderful aroma right away.
Combine Wet and Dry Mixtures:
Turn your mixer down to its lowest speed and gradually add the dry ingredients you whisked earlier. Mix just until the flour disappears and no dry streaks remain. Overmixing at this stage can lead to tough bars, so a few final folds by hand are a good idea.
Fold in the Chocolate Chips:
Switch to a sturdy spatula for this part. Gently fold in all of those glorious semi-sweet chocolate chips until they’re evenly distributed throughout the thick dough. This is where the magic really starts to come together visually.
Press Dough into Pan:
Transfer the dough to your prepared pan. Using your hands or the bottom of a glass, press the dough down firmly and evenly into every corner. If you’re using the optional chopped peanuts or sea salt, sprinkle them evenly over the top now for that finishing touch.
Bake Until Golden:
Slide the pan into your preheated oven and bake for 25 to 30 minutes. You’ll know they’re done when the edges are a beautiful golden brown and the center looks set. A toothpick test should reveal a few moist crumbs, not wet batter.
Cool Completely Before Cutting:
This is the hardest but most crucial step. Let the pan cool completely on a wire rack for a solid hour or two. The bars continue to set as they cool, and cutting them warm is a recipe for a crumbly mess. Patience rewards you with perfect squares.
You Must Know
- Room temperature ingredients are non-negotiable for a smooth, emulsified batter
- Parchment paper overhang is your best friend for flawless removal
- Letting the bars cool completely is the secret to clean cuts
- Underbaking slightly ensures the ultimate gooey, chewy center
- I always double the batch because they disappear so fast
Storage Tips
Once your peanut butter chocolate chip cookie bars are completely cool, store any leftovers (if you have any) in an airtight container at room temperature. They’ll stay soft and chewy for up to five days that way, and I find the flavor actually gets better on day two. For longer storage, you can wrap individual bars or the whole slab tightly in plastic wrap and then foil, and freeze them for up to three months. Just let them thaw on the counter when you’re ready for a treat – they taste just as good as the day you baked them.
Ingredient Substitutions
If you need a gluten-free version, a good 1-to-1 gluten-free flour blend works perfectly as a direct swap for the all-purpose flour. For dairy-free bars, use your favorite plant-based butter stick and make sure your chocolate chips are certified dairy-free. You can swap the creamy peanut butter for almond butter or sunflower seed butter if you have a peanut allergy, though the flavor profile will change slightly. Feel free to play with the chocolate too – I’ve used milk chocolate chips, dark chocolate chunks, or even a mix with white chocolate chips for different results. Just keep the total volume about the same for the best texture.
Serving Suggestions
These peanut butter chocolate chip cookie bars are pretty much perfect all on their own with a cold glass of milk, which is how my kids eat them every time. For a next-level dessert, warm a bar for about 15 seconds in the microwave and top it with a scoop of vanilla ice cream – the contrast of warm, gooey bar and cold, creamy ice cream is unreal. They’re also fantastic crumbled over a bowl of chocolate pudding or even packed into lunchboxes for a special surprise. I’ve even served them at brunch alongside coffee, and they’re always the first thing to go.
Cultural Context
The classic combination of peanut butter and chocolate is a truly American invention, finding its iconic status in candies and baked goods over the last century. Turning that beloved flavor duo into a simple, press-in-pan bar cookie is a modern home baking twist on the more labor-intensive drop cookie. It speaks to the desire for all the flavor and comfort of a homemade treat with the efficiency needed for busy lives, potlucks, and bake sales. This style of bar cookie is a staple in community cookbooks and family recipe boxes across the country, a reliable and shareable symbol of homemade sweetness.
Pro Tips
- Use a glass to press the dough evenly for uniform baking
- A toothpick test with moist crumbs means perfect doneness
- Let the pan cool on a wire rack for proper air circulation
- Mix chocolate chip types for a more complex chocolate flavor
- I always add the flaky sea salt – it’s a game changer
Frequently Asked Questions
For the best texture and flavor, use a standard creamy, processed peanut butter (like Jif or Skippy). Natural peanut butter that separates can make the bars oily and affect their structure. The recipe relies on the stabilizers in regular creamy peanut butter for perfect chewiness.
Absolutely! These bars are great for making ahead. Once completely cooled, store them in an airtight container at room temperature for up to 4 days. You can also freeze the baked and cooled bars for up to 3 months for a ready-to-go treat.
You can easily swap the semi-sweet chips for milk chocolate or dark chocolate chips based on your preference. For a fun twist, try using peanut butter chips instead, or use a mix of chocolate chunks and chips for varied texture.
The bars are done when the edges are golden brown and the center looks just set (not jiggly). A toothpick inserted near the center should come out with moist crumbs, not wet batter. They’ll continue to set as they cool in the pan.
These rich bars are fantastic on their own, but for an extra treat, serve them slightly warm with a scoop of vanilla ice cream. A cold glass of milk is also the classic American pairing that perfectly balances the sweetness.