

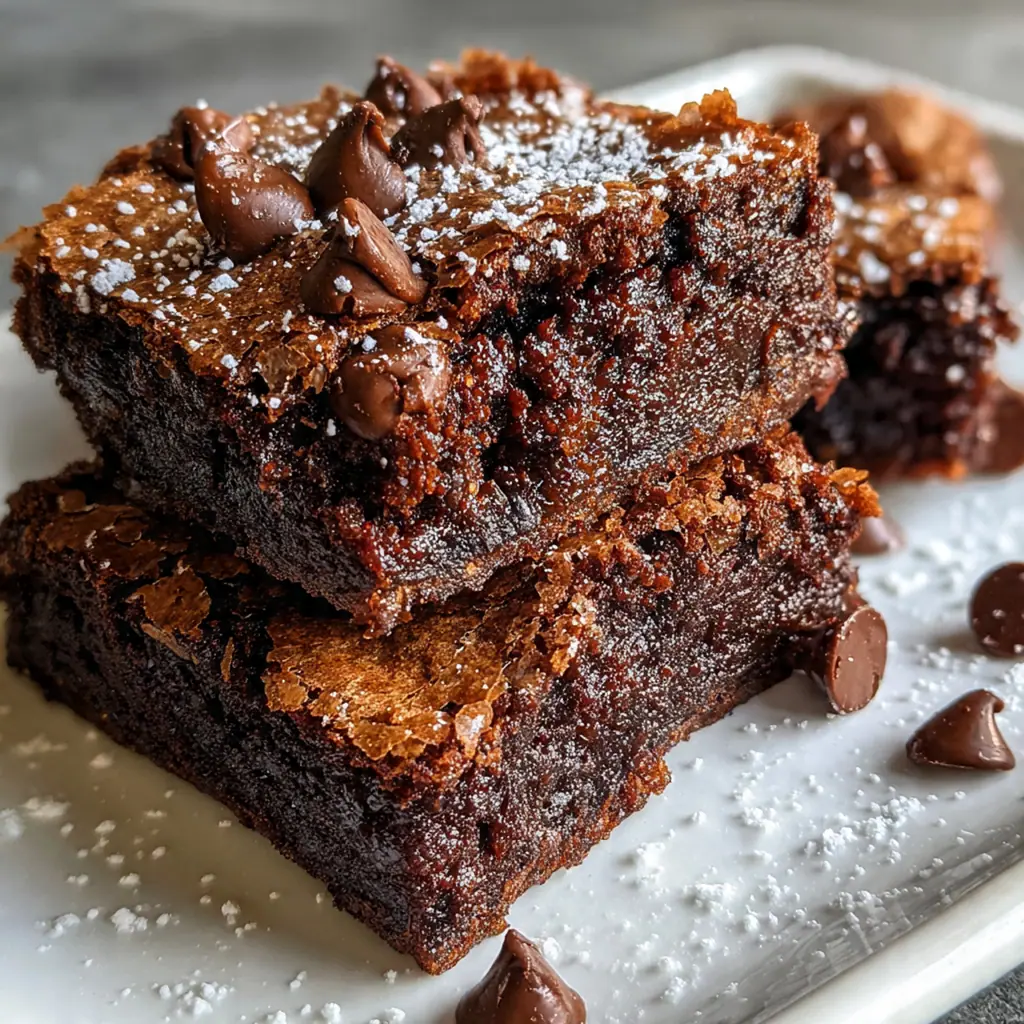
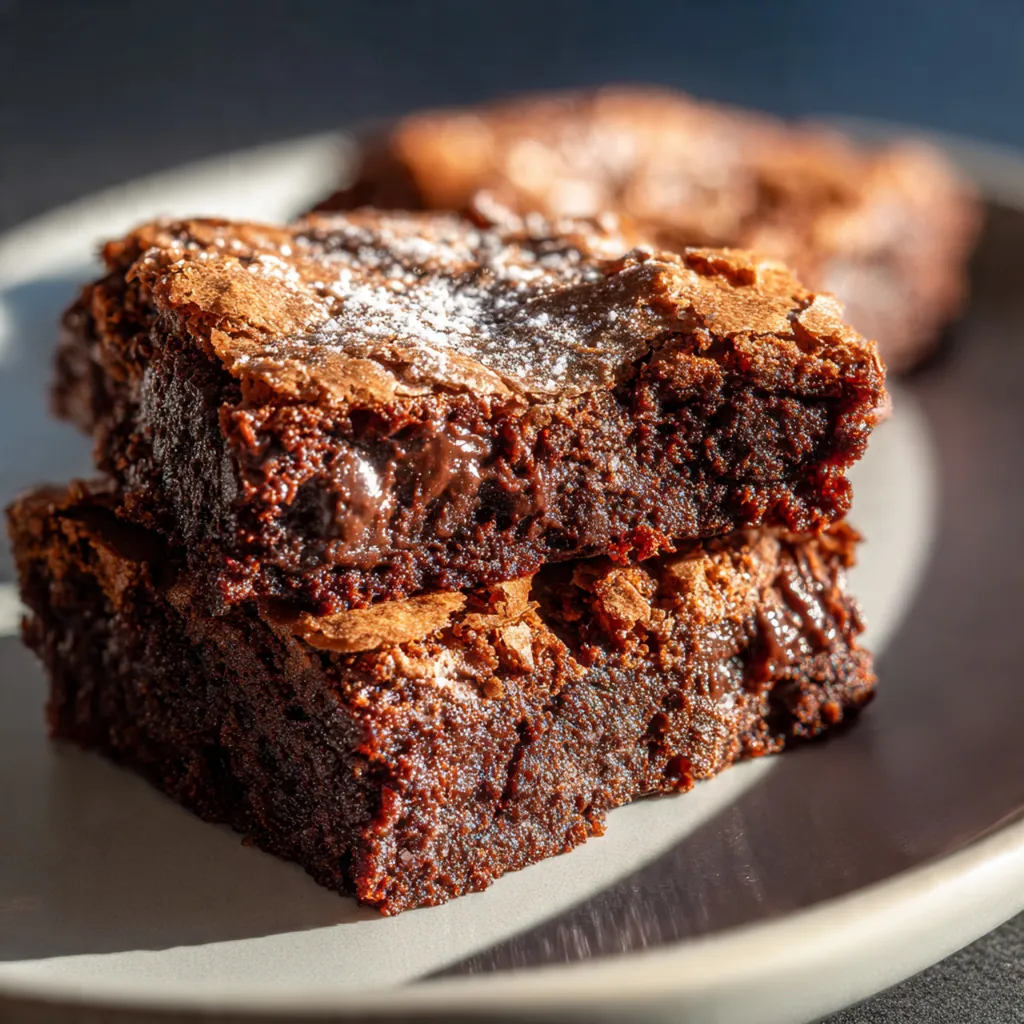
This is the fudgy brownie recipe you have been looking for, the one that ends the search. It delivers everything you could want: an intensely rich chocolate flavor, a classic crackly top, and a perfectly dense, chewy center. Forget the box mix forever, because this simple homemade brownie recipe is a true game-changer. Born from classic American baking traditions, this dessert is pure comfort and indulgence, made incredibly easy right in your own kitchen. This is my go-to recipe for a reason, and it’s about to become yours too.
Why You'll Love This Recipe
- Achieves that perfect crackly top and dense, fudgy center
- Packed with three types of chocolate for ultimate richness
- Uses simple pantry staples you likely already have on hand
- So much better than a boxed mix and just as simple to make
- They honestly get even fudgier the next day
Ingredients You’ll Need
- Unsalted butter: This is the foundation of the rich flavor and melt-in-your-mouth texture. Using unsalted lets you control the salt level perfectly.
- Bittersweet chocolate: This provides the deep, complex chocolate base. Choose a good quality bar you’d enjoy eating on its own for the best results.
- Granulated sugar: Provides most of the sweetness and is crucial for creating that signature shiny, crackly top when properly whisked with the eggs.
- Light brown sugar: Adds a subtle molasses flavor and extra moisture, which contributes to the wonderfully chewy and fudgy texture of this brownie recipe.
- Large eggs: These act as a binder, providing structure and richness. Using them at room temperature is key for a smooth, well-emulsified batter.
- Pure vanilla extract: Vanilla doesn’t make the brownies taste like vanilla, it just makes the chocolate flavor richer and more profound. Always use pure extract.
- All-purpose flour: Just enough is used to give the brownies structure without making them cakey. The minimal amount keeps them dense and fudgy.
- Unsweetened cocoa powder: This ingredient deepens the chocolate flavor, adding another layer of richness that complements the melted chocolate perfectly.
- Salt: A small amount of salt is essential in any sweet recipe. It balances the sweetness and makes the chocolate flavor pop.
- Semi-sweet chocolate chips: These are folded in at the end to create pockets of melted chocolate throughout every single bite, ensuring a decadent experience.
- Flaky sea salt: This optional finishing touch provides a lovely textural contrast and a final burst of flavor that cuts through the richness beautifully.
How to Make It
Prepare Your Pan and Oven:
First things first, get your oven preheating to 350°F (175°C). Proper oven temperature is crucial for baking this brownie recipe correctly from the moment it goes in. While it heats up, prepare your 8×8 inch baking pan. Grease it lightly, then line it with parchment paper. The trick is to leave some paper hanging over two opposite sides. These overhangs will act as handles, making it incredibly easy to lift the entire slab of brownies out of the pan once they’ve cooled. It’s a simple step that makes cutting and serving so much cleaner.
Melt the Chocolate and Butter:
In a medium saucepan, combine your cubed unsalted butter and the chopped bittersweet chocolate. Place it over low heat, because you never want to scorch your chocolate. Stir it frequently with a spatula as it melts. You’re looking for a completely smooth, glossy, and unified mixture. Once everything is melted and combined, remove the pan from the heat. Let it cool on the counter for about 5 minutes. This is important so you don’t accidentally scramble the eggs in the next step.
Create the Sugary Base:
In a large mixing bowl, it’s time to build the foundation for that amazing crackly top. Combine the granulated sugar, light brown sugar, and your room temperature eggs. Using a whisk, beat them together vigorously for a full 2 minutes. You’ll see the mixture transform, becoming paler in color and noticeably thicker and fluffier. This process of dissolving the sugar and aerating the eggs is the secret to getting that paper-thin, shiny crust that every perfect brownie needs. Don’t skip this timing, it really matters.
Combine the Wet Ingredients:
Once your egg and sugar mixture is pale and fluffy, it’s time to whisk in the pure vanilla extract. Next, grab your saucepan with the slightly cooled, melted chocolate and butter. While whisking the egg mixture constantly with one hand, slowly stream in the chocolate mixture with the other. Keep whisking until everything is fully incorporated. The batter should look incredibly glossy, smooth, and homogenous. This step ensures a seamless and rich base for your fudgy brownie recipe.
Fold in the Dry Ingredients:
In a separate small bowl, whisk together the all-purpose flour, unsweetened cocoa powder, and salt. This quick step ensures that the leavening and salt are evenly distributed, so you don’t get any salty or bland pockets. Now, add these combined dry ingredients to your wet mixture in the large bowl. Switch from a whisk to a rubber spatula. Gently fold the dry ingredients in until they are just combined. The key here is not to overmix. Stop folding the moment you no longer see any dry streaks of flour or cocoa. Overmixing develops gluten, which leads to a tough, cakey brownie instead of a fudgy one.
Add the Final Chocolate Touch:
Now for the best part. Pour the semi-sweet chocolate chips into the batter. Use your rubber spatula to gently fold them in. Just a few turns are needed to distribute them evenly throughout the batter. These chips will create those wonderful pockets of gooey, melted chocolate in the finished product, taking this brownie recipe from great to absolutely unforgettable. It’s a layer of texture and flavor that makes all the difference.
Pour and Bake to Perfection:
Pour the thick, glossy batter into your prepared 8×8 pan. Use your spatula to gently guide and spread it into an even layer, making sure it reaches all the corners. Now it’s ready for the oven. Bake for 28-32 minutes. You’ll know it’s done when the edges look set and slightly pulled away from the sides of the pan. The ultimate test is with a toothpick: insert it into the center. It should come out with moist, fudgy crumbs attached, but not raw, wet batter. It’s always better to slightly underbake than overbake a brownie.
Cool, Garnish, and Slice:
As soon as you pull the pan from the oven, place it on a wire rack to begin cooling. If you’re using the flaky sea salt, now is the time to sprinkle it evenly over the hot surface. The heat will help it adhere perfectly. Now comes the hardest part: waiting. You must let the brownies cool completely in the pan for at least one hour, though two is even better. This crucial resting period allows them to set fully, developing that dense, fudgy texture. Trying to cut them while warm will result in a gooey mess. Once cooled, use the parchment handles to lift them out and slice into squares.
You Must Know
- Room temperature eggs are essential for a smooth batter
- Do not overmix the flour or your brownies will be cakey
- Let them cool completely in the pan for the cleanest cuts
- This is the only brownie recipe you’ll ever need
Storage Tips
Storing these brownies is simple, and they stay wonderfully fresh for days. Keep them in an airtight container at room temperature for up to four days. I find that their texture gets even fudgier and more dense on day two, so making them a day ahead is a great idea. If you prefer a firmer, chewier brownie, you can store them in the fridge. For longer-term storage, they freeze beautifully. Just wrap them tightly in plastic wrap and then foil, and they’ll keep in the freezer for up to three months. Let them thaw at room temperature before enjoying.
Ingredient Substitutions
This brownie recipe is pretty straightforward, but you do have some flexibility. If you’re out of bittersweet chocolate, you can use all semi-sweet, but the flavor will be a bit sweeter and less complex. Similarly, dark chocolate (60-70% cacao) works as a great substitute. If you only have salted butter, you can use it and simply reduce the added salt in the recipe to 1/8 teaspoon. For a different flavor profile, you could swap the semi-sweet chocolate chips for milk chocolate, white chocolate, or even peanut butter chips. Just be sure to use high-quality chocolate for the best possible homemade brownies.
Serving Suggestions
These brownies are absolutely perfect on their own, perhaps with a cold glass of milk for a classic pairing. However, if you want to turn them into a truly show-stopping dessert, gently warm a square in the microwave for about 15 seconds. Top the warm brownie with a generous scoop of vanilla bean ice cream. The contrast between the warm, fudgy brownie and the cold, creamy ice cream is heavenly. To take it one step further, add a drizzle of hot fudge or rich caramel sauce over the top. A dollop of fresh whipped cream and some fresh raspberries also provides a lovely contrast to the rich chocolate.
Cultural Context
The brownie is a cornerstone of American baking, a beloved dessert that feels both special and wonderfully down-to-earth. Its exact origin is debated, but many credit its creation to the chefs at Chicago’s Palmer House Hotel for the 1893 World’s Columbian Exposition. They were tasked with creating a portable, cake-like confection for ladies attending the fair. Since then, the brownie has become a bake sale champion, a potluck favorite, and the ultimate comfort food. This particular fudgy brownie recipe honors that tradition of simple, rich, and deeply satisfying chocolate goodness. It’s a nostalgic treat that continues to be a staple in home kitchens across the country, proving that some classics simply can’t be improved upon.

Pro Tips
- Quality chocolate is non-negotiable for the best flavor
- Whisking the eggs and sugar is the key to a crackly top
- It’s always better to underbake than to overbake these brownies
- Parchment paper handles will make your life so much easier
- Trust me, don’t skip the cooling time before you slice
Frequently Asked Questions
For this fudgy brownie recipe, we recommend a combination of bittersweet chocolate and unsweetened cocoa powder. The chopped bittersweet chocolate melts into the batter for richness, while the cocoa powder provides a deep, foundational chocolate flavor. Using both creates a complex taste that’s far better than just one type. High-quality chocolate chips are also a great option.
Absolutely! This brownie recipe is perfect for making ahead. Once the brownies have cooled completely, you can cover them tightly and store them at room temperature for up to 3 days. They’ll stay perfectly fresh and fudgy, making them great for parties or just to have on hand for a sweet treat.
If you don’t have bittersweet chocolate, you can easily substitute semi-sweet chocolate for a slightly sweeter result. For a deeper, less sweet flavor, you could use dark chocolate (60-70% cacao). We don’t recommend using milk chocolate, as it will make this brownie recipe overly sweet and less rich.
The brownies are done when the edges look set and the top has that classic, shiny crackle. A wooden skewer inserted into the center should come out with moist, fudgy crumbs attached, but not wet batter. Be careful not to overbake, as that will dry them out. The bake time is around 30 minutes.
These classic American brownies are amazing on their own! For an extra decadent treat, serve a warm brownie with a scoop of vanilla bean ice cream and a drizzle of chocolate sauce. For a simpler pairing, a cold glass of milk or a hot cup of coffee is the perfect companion to this brownie recipe.