

This classic pumpkin pie recipe delivers on every promise of the perfect holiday dessert. It’s the one I turn to year after year, a foolproof guide to achieving a shatteringly flaky, all-butter crust and a rich, creamy custard filling that’s perfectly spiced. This homemade pumpkin pie is a cornerstone of American holiday baking, bringing warmth and nostalgia to any gathering. Forget the bland, store-bought versions; this recipe creates a truly memorable dessert that will become your new family tradition. It truly is the only pumpkin pie recipe you’ll ever need.
Why You'll Love This Recipe
- The all-butter crust is unbelievably flaky and tender
- The filling is silky-smooth and never cracks or gets watery
- A perfect balance of warm spices for that classic autumn flavor
- It’s the show-stopping dessert for Thanksgiving and holidays
- This is my go-to recipe because it never fails
Ingredients You’ll Need
- All-purpose flour: This is the foundation of your flaky pie crust, providing structure. Don’t use bread flour, as it will make the crust too tough and chewy.
- Fine sea salt: A crucial ingredient used in both the crust and filling to enhance all the other flavors, balancing the sweetness and spices perfectly.
- Granulated sugar: Just a touch is used in the pie dough to add a hint of sweetness and help the crust brown beautifully in the oven.
- Unsalted butter: This is the secret to a flaky crust. It must be ice-cold to create steam pockets as it bakes, which separate the flour into delicate layers.
- Ice water: The binder for your dough. Using ice-cold water is critical to keep the butter solid, ensuring a tender, flaky result instead of a tough one.
- 100% pure pumpkin puree: Use canned pure pumpkin, not pumpkin pie filling. This gives you complete control over the flavor and texture of your pie.
- Light brown sugar: Provides a deep, molasses-like sweetness that complements the pumpkin and spices far better than white sugar alone.
- Large eggs: These are essential for the structure of the custard filling. They help it set into a smooth, sliceable texture as it bakes.
- Ground cinnamon: The quintessential warm spice for any pumpkin dessert. It provides that familiar, comforting aroma and flavor that screams autumn.
- Ground ginger: Adds a touch of zesty warmth and a slightly spicy note that cuts through the richness of the pumpkin custard.
- Ground nutmeg: Brings a sweet, nutty, and slightly woody flavor that is an essential part of the classic pumpkin spice blend.
- Ground allspice: This single spice contributes a complex flavor reminiscent of cinnamon, nutmeg, and cloves, adding incredible depth to the pie.
- Ground cloves: A very potent and aromatic spice, so just a pinch is needed. It adds a deep, slightly peppery warmth to the filling.
- Evaporated milk: This provides the ultra-creamy, rich texture for the filling without adding excess water, which helps prevent a soggy bottom crust.
How to Make It
Prepare the All-Butter Pie Crust:
First, you’ll make the foundation of this amazing pumpkin pie recipe. In a medium bowl, whisk together the all-purpose flour, a portion of the fine sea salt, and the granulated sugar. This step ensures the salt and sugar are evenly distributed. Scatter the cold butter cubes over the top. Using a pastry blender or just your fingertips, cut the butter into the flour. You’re looking for a texture that resembles coarse crumbs with some pea-sized pieces of butter still visible. Those little butter pieces are the key to a flaky crust.
Hydrate and Chill the Dough:
Now it’s time to bring the dough together. Sprinkle three tablespoons of ice-cold water over the flour and butter mixture. Use a fork to gently toss it all together until the dough just starts to form clumps. If it feels too dry and crumbly, add more ice water one tablespoon at a time. Be careful not to add too much! The dough should not be sticky. Gently press the dough into a flat disk, wrap it tightly in plastic wrap, and let it rest in the refrigerator for at least 30 minutes. This chill time is crucial for relaxing the gluten, which makes the dough easier to roll out and keeps it tender.
Preheat the Oven and Baking Sheet:
Before you roll out the dough, get your oven ready. Adjust an oven rack to the lower-middle position and place a baking sheet directly on it. Preheat your oven to a hot 425°F. Heating the baking sheet along with the oven is a fantastic trick. When you place your pie on it, the intense, direct heat will immediately start cooking the bottom crust, which is your best defense against a dreaded soggy bottom.
Roll and Shape the Crust:
Once the dough has chilled, it’s time to shape your pie. On a lightly floured surface, roll the dough disk into a 12-inch circle. Work from the center outwards, rotating the dough as you go to maintain an even circle. Carefully drape the dough over your rolling pin to transfer it to a 9-inch pie plate. Gently press it into the bottom and up the sides. Trim the excess dough, leaving about a 1-inch overhang. Fold this overhang under itself to create a thick rim, then crimp the edge decoratively. Pop the whole pie shell into the freezer for 15 minutes to firm up before filling.
Mix the Pumpkin Filling:
While the crust gets its final chill, you can whip up the simple but perfect filling. In a large bowl, whisk together the canned pumpkin puree, packed light brown sugar, the large eggs, the remaining sea salt, and all of the warm spices. Continue whisking until the mixture is completely smooth and uniform in color. This step ensures that every single bite of your finished pumpkin pie recipe is perfectly seasoned and sweetened.
Finish the Silky Custard:
With the base of your filling mixed, it’s time to add the final ingredient that creates its signature creamy texture. Gradually pour in the can of evaporated milk while whisking continuously. Keep whisking just until the milk is fully incorporated and the mixture is silky and smooth. It’s important not to overmix here; you just want everything combined without incorporating too much air, which can cause the pie to crack as it bakes.
Bake the Pie in Two Stages:
Retrieve your chilled pie shell from the freezer and pour the pumpkin filling into it. Carefully place the pie onto the preheated baking sheet in your 425°F oven. Bake it at this high temperature for exactly 15 minutes. This initial blast of heat helps set the pie crust quickly. After 15 minutes, reduce the oven temperature to 350°F. Continue baking for another 35 to 45 minutes. The pie is done when the edges are set and the center still has a slight jiggle to it.
Cool Completely Before Slicing:
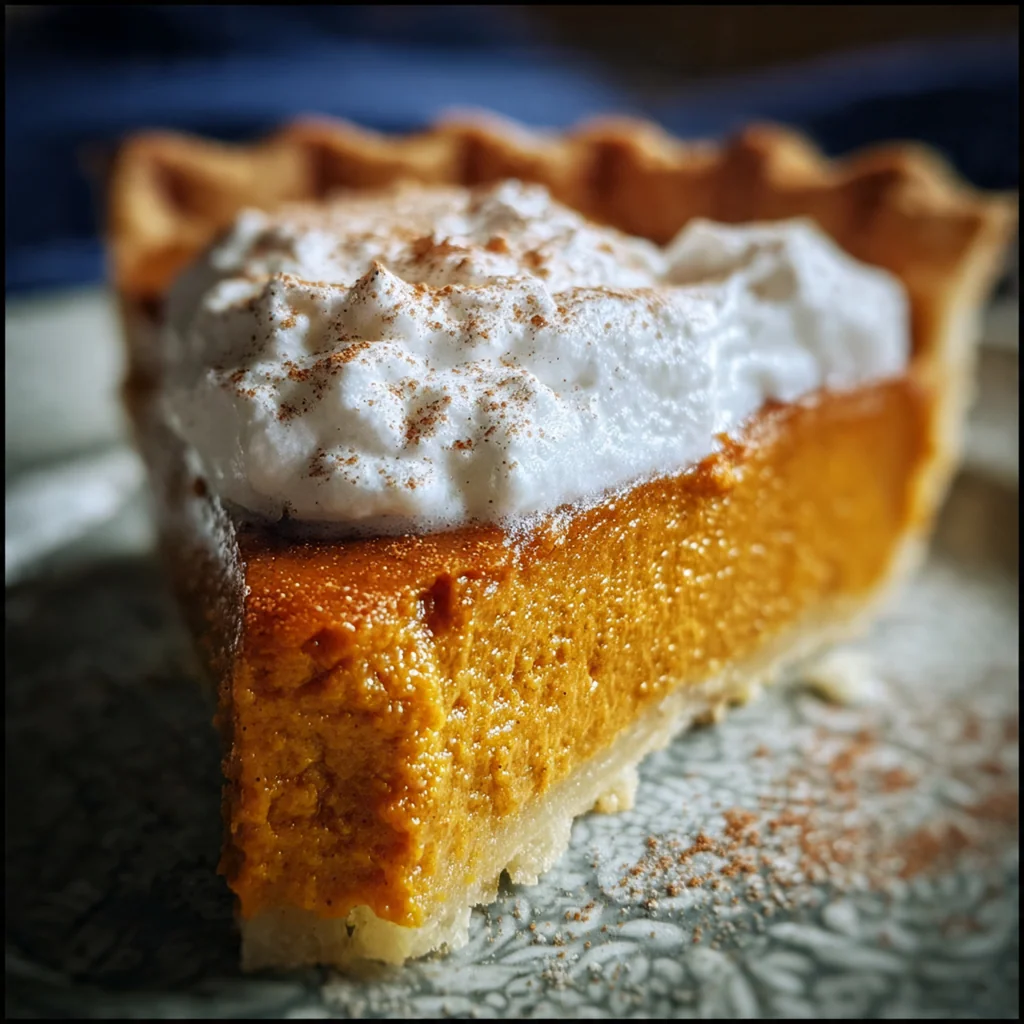
This is the most important and often overlooked step in making the perfect pumpkin pie recipe. Once the pie is done baking, transfer it to a wire rack to cool completely. This will take at least two hours. During this time, the residual heat will continue to cook the center and the custard will fully set up. If you try to slice it while it’s still warm, you’ll have a soupy mess. Patience is key for achieving those clean, beautiful slices everyone wants.
You Must Know
- Use 100% pure pumpkin puree, not pie filling
- Your butter and water must be ice-cold for a flaky crust
- The preheated baking sheet is the secret to a crisp bottom
- Letting the pie cool completely is not optional for clean slices
Storage Tips
Once your pumpkin pie has cooled completely to room temperature, you can store it in the refrigerator. Cover it loosely with plastic wrap or aluminum foil to protect it from absorbing any other fridge odors. It will keep well for up to 4 days, making it a great dessert to prepare ahead of a holiday meal. Just know that the all-butter crust is at its absolute best on day one and may soften slightly over time, but the flavor of the filling often gets even better on the second day as the spices meld together. I don’t recommend freezing the baked pie as it can cause the filling to become watery upon thawing.
Ingredient Substitutions
While this pumpkin pie recipe is classic for a reason, you do have a little flexibility. If you need a gluten-free version, simply swap the all-purpose flour crust for your favorite gluten-free pie crust recipe; the filling itself is naturally gluten-free. If you find you’re out of one of the minor spices like allspice or cloves, you can leave it out, though the flavor profile will be slightly less complex. However, I don’t recommend substituting the core components like pumpkin puree, evaporated milk, or brown sugar, as these are essential for the signature texture and taste of this fantastic homemade pumpkin pie.
Serving Suggestions
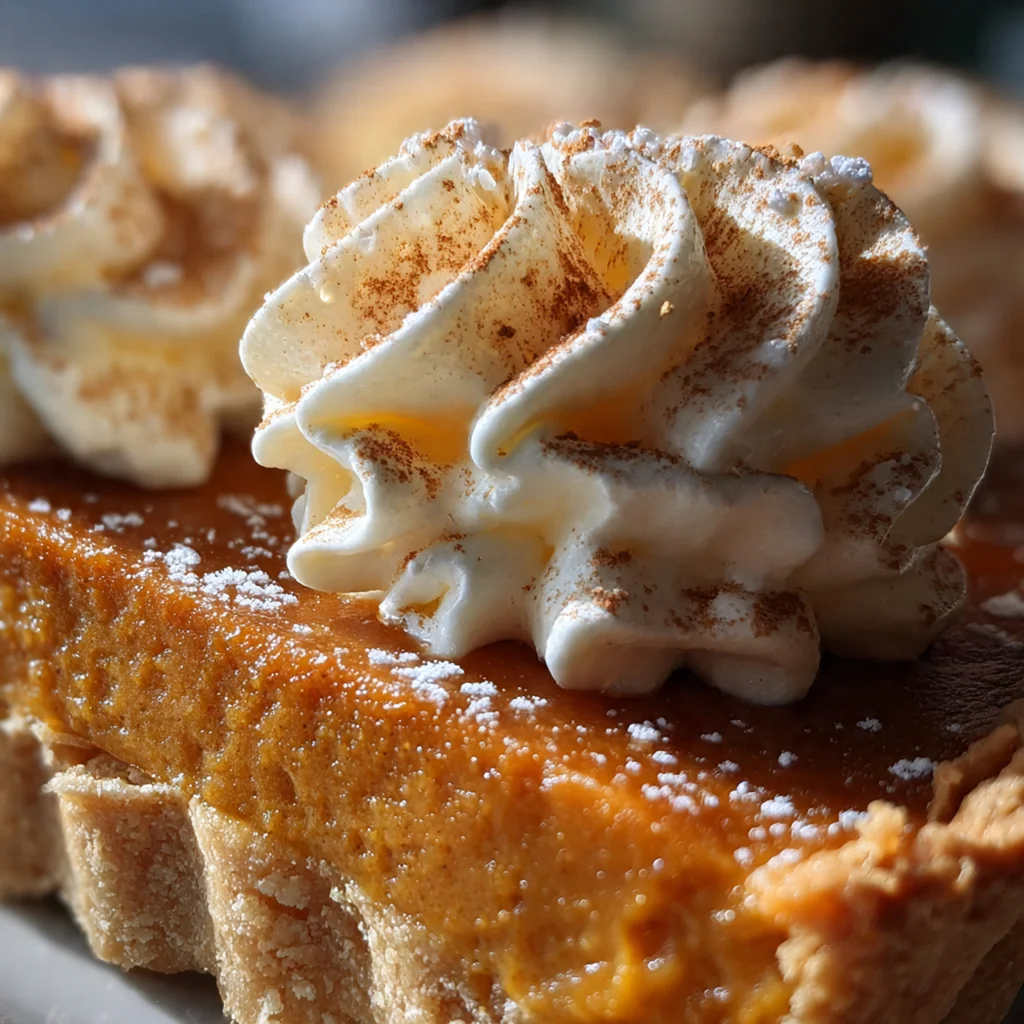
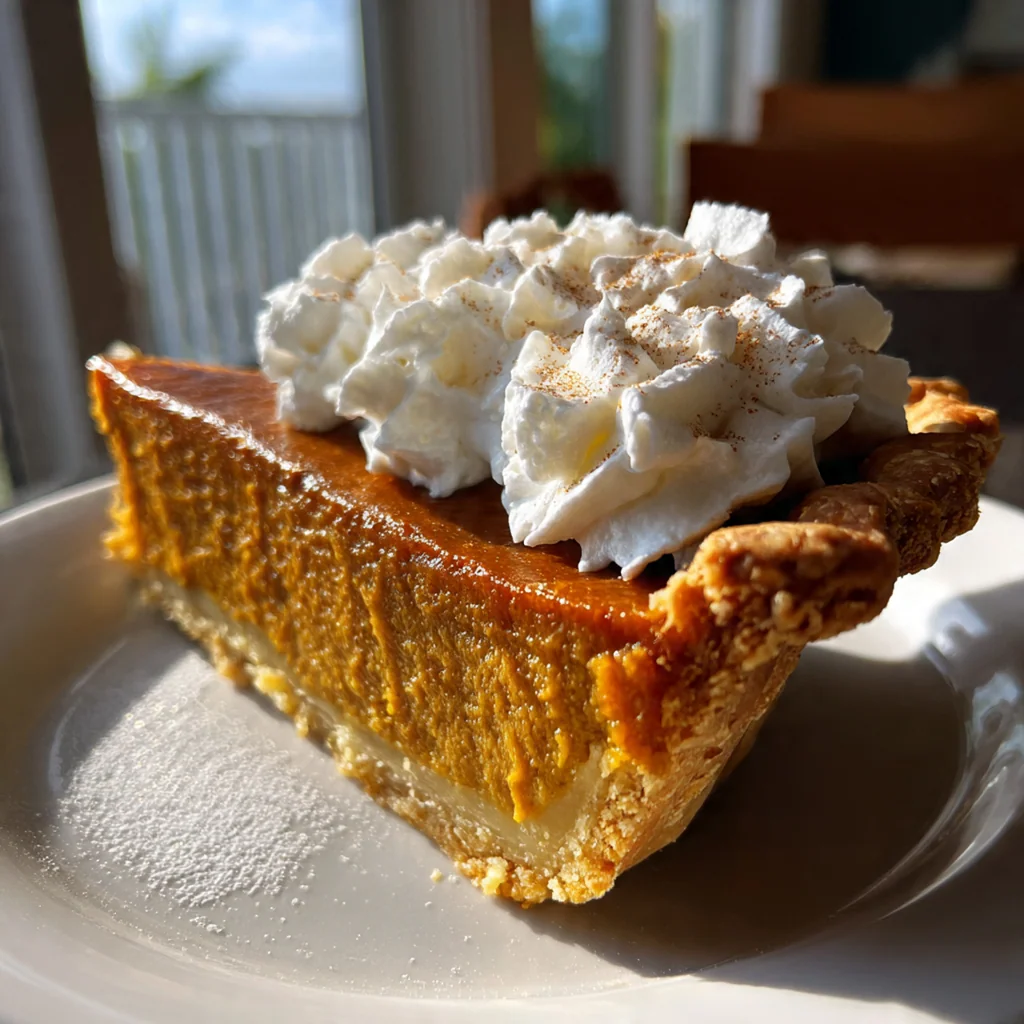
A slice of this classic pumpkin pie is wonderful on its own, but it becomes truly spectacular with the right accompaniments. A generous dollop of freshly sweetened whipped cream is the traditional choice, providing a light and airy contrast to the dense, creamy filling. For an even richer treat, try a small scoop of vanilla bean ice cream that will slowly melt into the pie. To complete the experience, serve each slice alongside a warm beverage. A cup of hot coffee, a spiced latte, or a mug of hot apple cider perfectly complements the warm spices in the pie, making it the perfect end to any autumn meal.
Cultural Context
The pumpkin pie is more than just a dessert; it’s a cherished icon of American holiday tradition, particularly for Thanksgiving. Its roots trace back to early American colonists, but it evolved over centuries into the sweet, custard-based pie we know today. Serving this pumpkin pie recipe connects us to generations of family gatherings and harvest celebrations. The aroma of cinnamon, ginger, and nutmeg baking in the oven instantly evokes feelings of warmth, comfort, and nostalgia. It represents the bounty of the autumn season and holds a permanent, beloved spot on the holiday table, a sweet symbol of gratitude and togetherness that is quintessentially American. Making a homemade pumpkin pie is a tradition many families look forward to all year.
Pro Tips
- Ensure your butter and water are ice-cold for the flakiest crust
- Don’t use pumpkin pie filling, only 100% pure pumpkin puree
- A preheated baking sheet is your best bet against a soggy bottom
- The two-hour cooling step is essential for the filling to set
Frequently Asked Questions
For this pumpkin pie recipe, it’s best to use 100% pure pumpkin puree from a can, not pumpkin pie filling. The filling is already sweetened and spiced, which will throw off the flavor balance of our ingredients. Using pure puree gives you complete control over the sweetness and the blend of cinnamon, ginger, and nutmeg.
Absolutely! You can bake this pumpkin pie recipe up to 2 days in advance. Let it cool completely, then cover it loosely with plastic wrap and store it in the refrigerator. We recommend letting it sit at room temperature for about 30 minutes before serving to take the chill off for the best flavor.
If you don’t have all the individual spices, you can substitute them with 1 3/4 teaspoons of pumpkin pie spice. Our pumpkin pie recipe calls for a specific blend of cinnamon, ginger, nutmeg, allspice, and cloves for the best flavor, but a pre-made spice blend is a great shortcut in a pinch.
The pumpkin pie is ready when the edges of the filling are set and the center is still slightly wobbly, like gelatin. A knife inserted about 1 inch from the crust should come out clean. The pie will continue to set as it cools, so be careful not to overbake it, which can cause cracks.
This classic American pumpkin pie is perfect on its own, but it’s even better with a generous dollop of freshly whipped cream or a scoop of vanilla bean ice cream. For a festive touch, you can also sprinkle a little extra cinnamon on top before serving this delightful dessert.